
With free trial licenses for VM Squared about to drop, it seemed like an excellent time to walk through the process of migrating VMs from VMware to VM Squared. Meet Catalyst, our VM migration tool, usable via GUI or command line as part of both VM Squared and our private cloud platform, HyperCloud.
Once connected to a VMware ESXi host or a vCenter, Catalyst can automatically migrate most virtual machines into VM Squared. Here’s what the process looks like from start to finish.
Enable ESXi access
Before starting the Catalyst application, you must first enable SSH on your ESXi host and configure key-based authentication.
Start by logging into your ESXi deployment, then look under Host > Manage to confirm “TSM-SSH” is running. If not, follow the product’s instructions for enabling the service.
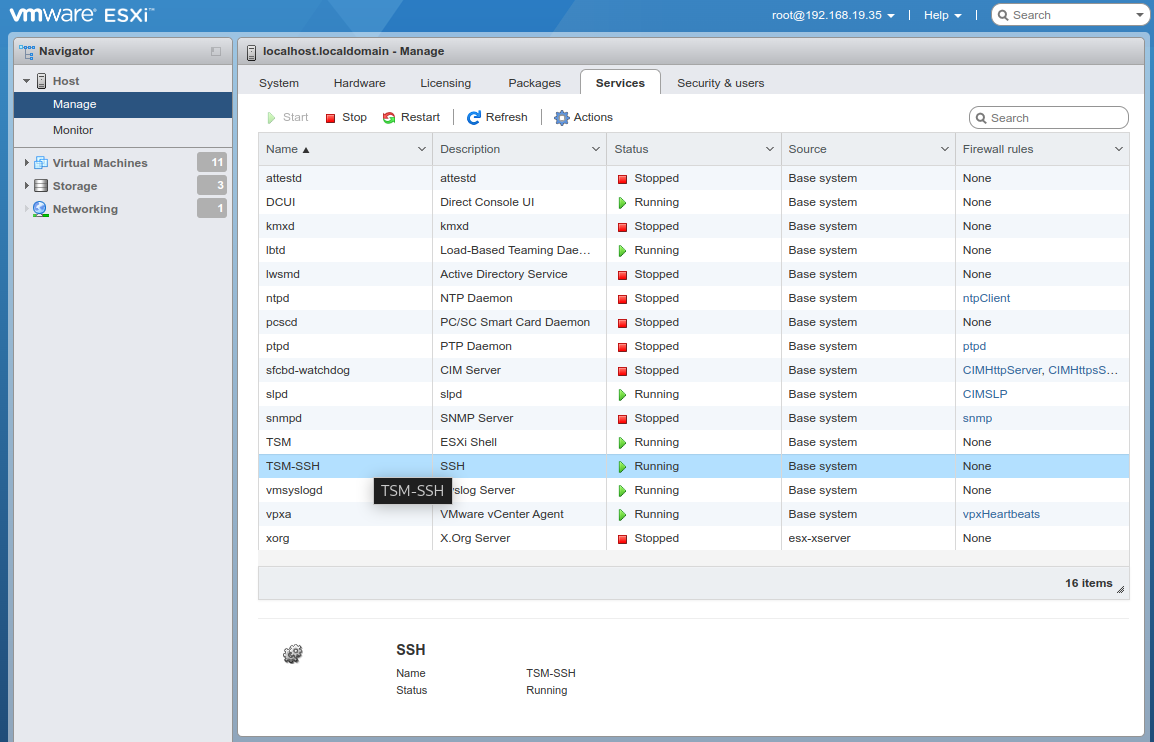
Once the SSH service reports as Running, we will use it to set up key-based access to the deployment, allowing secure downloads without exposing your system passwords to VM Squared.
Connect to your ESXi host and create a key by running /usr/lib/vmware/openssh/bin/ssh-keygen
Here is an example of the process.
[root@localhost:~] /usr/lib/vmware/openssh/bin/ssh-keygen
Generating public/private rsa key pair.
Enter file in which to save the key (//.ssh/id_rsa):
Created directory '//.ssh'.
Enter passphrase (empty for no passphrase):
Enter same passphrase again:
Your identification has been saved in //.ssh/id_rsa
Your public key has been saved in //.ssh/id_rsa.pub
The key fingerprint is:
SHA256:vzStRA7GPetktU1Rsgig/kL+pytbpbEpc+M9zb8Y84A root@localhost
The key's randomart image is:
+---[RSA 3072]----+
|        ...   . .|
|       .   . . + |
|      .     . o  |
|     . . .     . |
|      o S = . .  |
|     o o @ * +   |
|      = O Eo* .  |
|      .O Oo+o*   |
|      .o=+=...+. |
+----[SHA256]-----+
Now we must give the new key permission to log in remotely. Add it to the file /etc/ssh/keys-root/authorized_keys as outlined in the VMware KB using a command like the one below.
cat /.ssh/id_rsa.pub >> /etc/ssh/keys-root/authorized_keys
We also need the contents of the private key, to be used later in the process. Copy the file using scp, or copy the contents of /.ssh/id_rsa and place it somewhere safe.
Download Catalyst
After setting up and logging into a VM Squared deployment, you can download the Catalyst App by going to Storage > Apps as shown below.
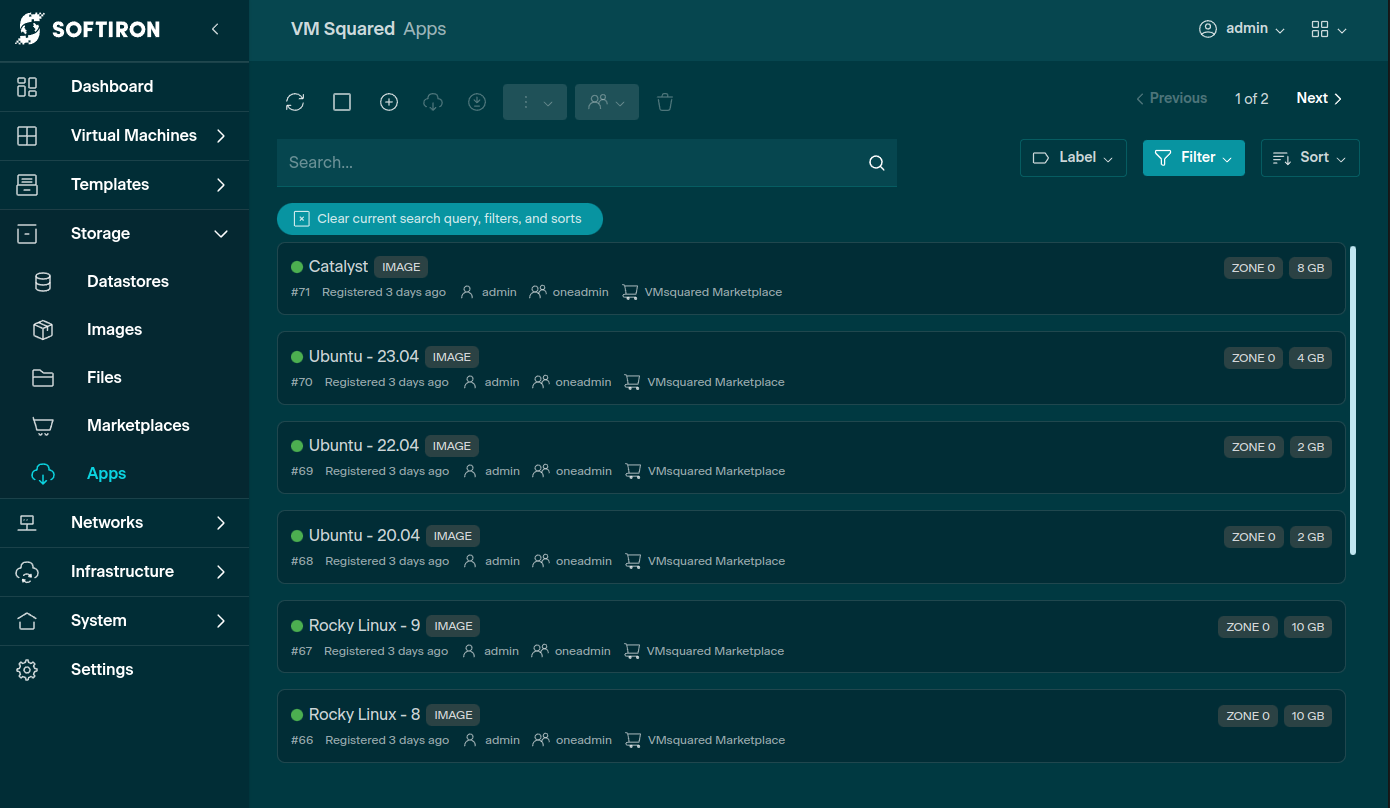
Find the Catalyst app in the list. Select it, then click the “Import into Datastore” button.

The Download App view should open. On the first screen, leave the app and template names as Catalyst, then select Next.
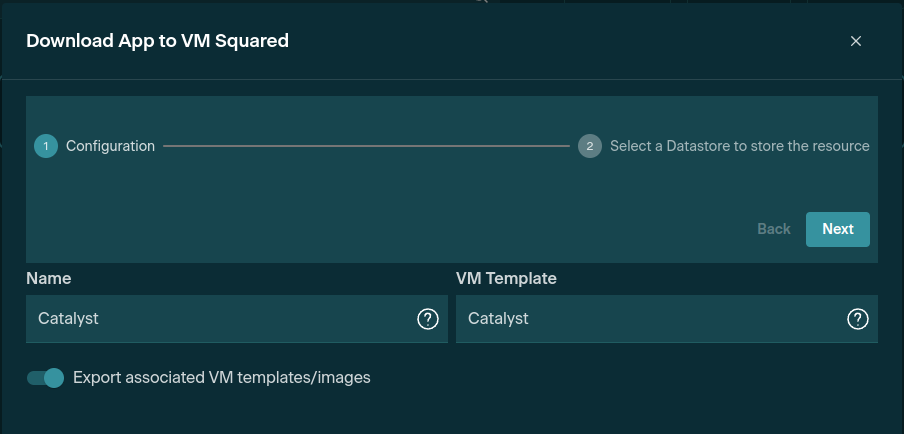
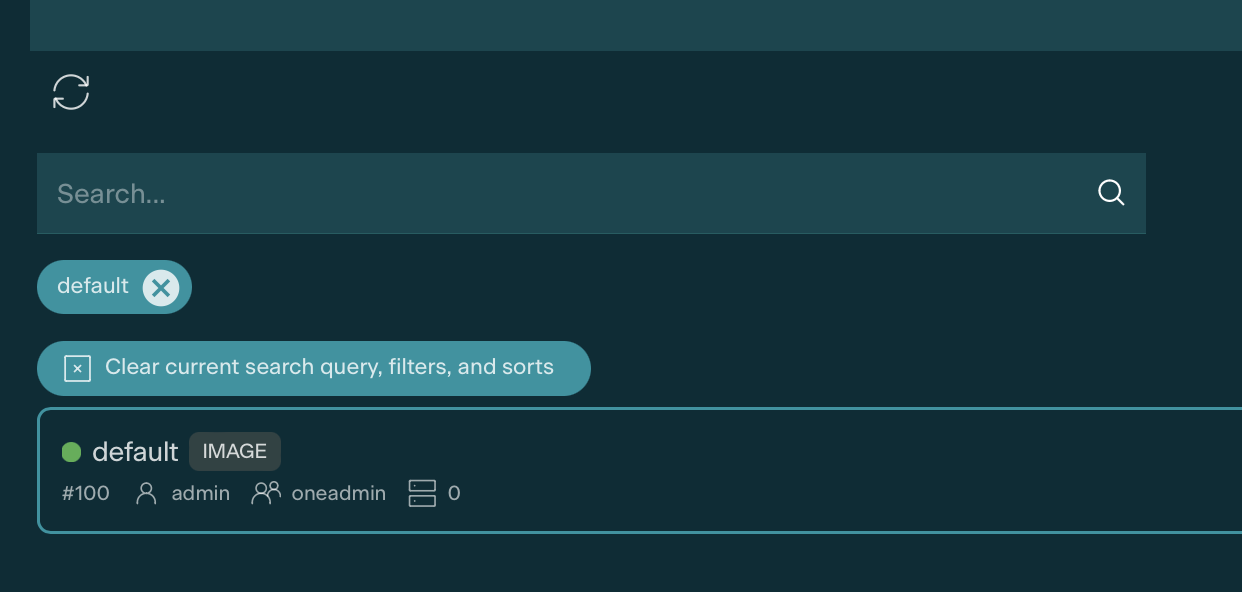
Now choose the datastore where Catalyst will be installed. We strongly recommend using the default datastore.
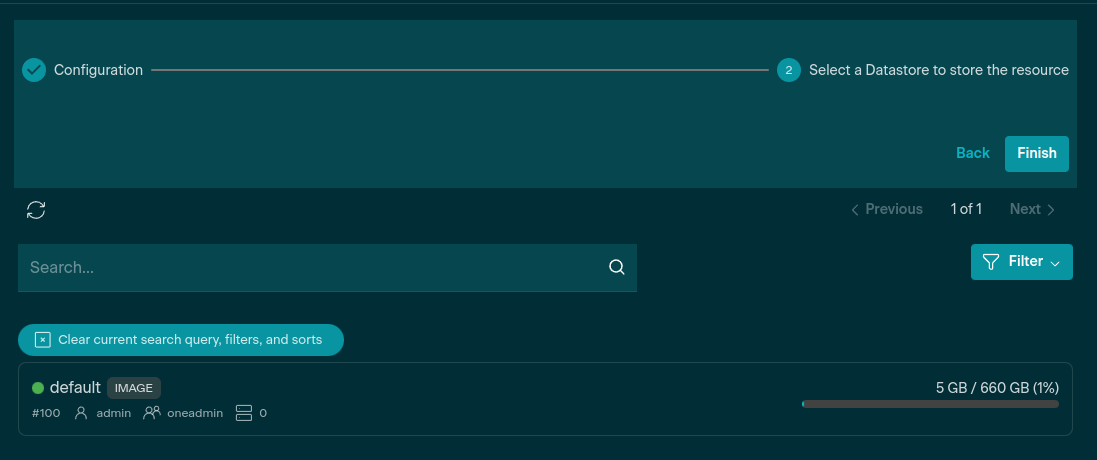
After selecting a datastore, its name should appear below the search field.
Select the Finish button, then the download will begin. After a few moments or a few minutes, depending on your connection speed, the Catalyst app will be available under Templates > VM Templates, ready to be deployed.
Deploying Catalyst
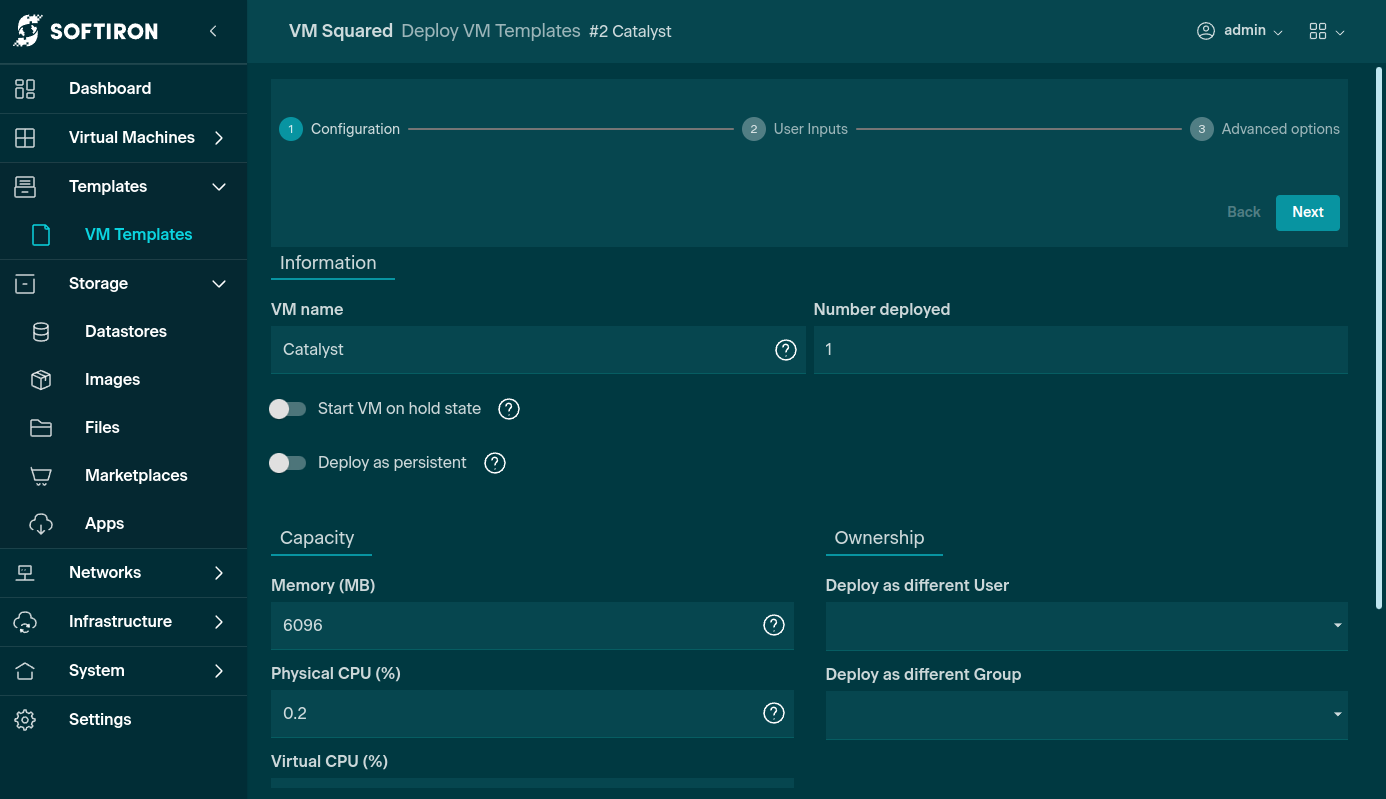
Select the Catalyst template from VM Templates and click the Deploy button to begin setting up Catalyst.
When presented with the Configuration screen, pick a name and click Next.
User inputs
Catalyst will need some environment-specific information. Catalyst’s user inputs contain the information needed to connect to vCenter or ESXi. (Don’t worry. These fields can be modified later.)
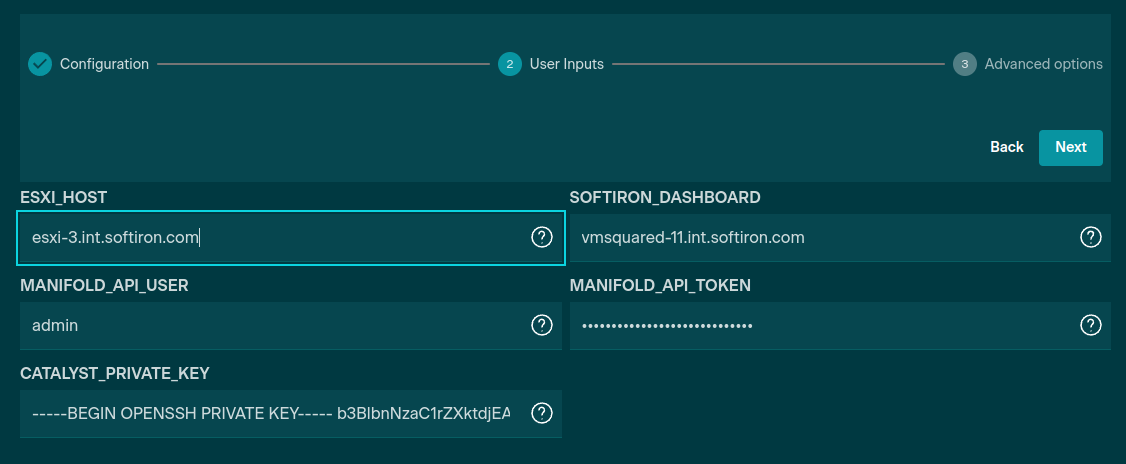
User inputs are:
- ESXi_HOST — IP or DNS address of your ESXi host containing VMs to import.
- SOFTIRON_DASHBOARD — IP or DNS address of the VM Squared Web dashboard.
- MANIFOLD_API_USER — username of VM Squared user with permission to create images and templates
- MANIFOLD_API_TOKEN — password of VM Squared user
- CATALYST_PRIVATE_KEY — private SSH key, as created in the preparing ESXi access step
App storage
Select the Storage tab, then click the Edit button to configure how much space the app will be allowed once deployed.
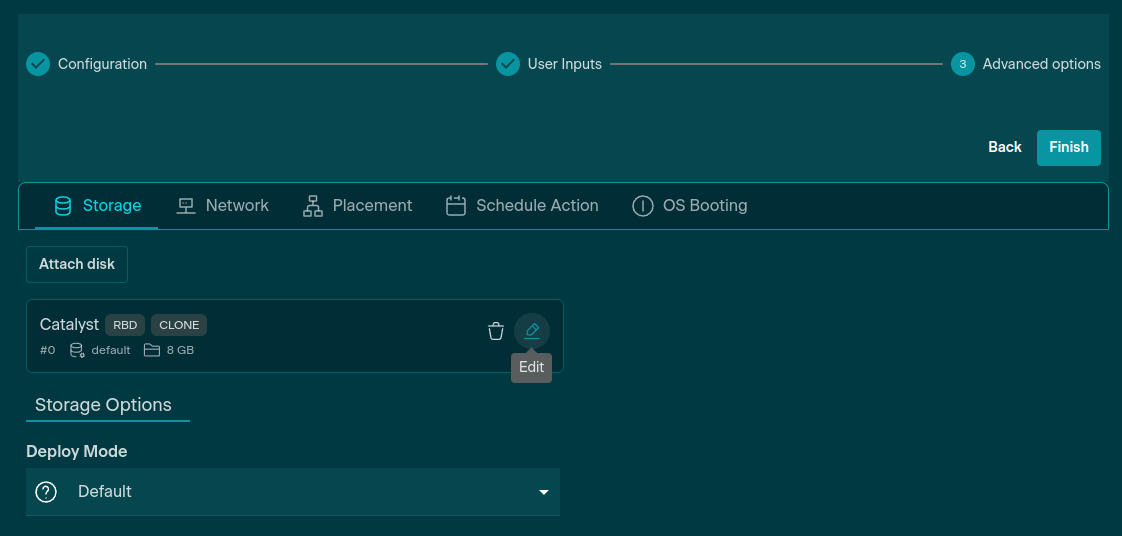
Catalyst must have at least enough space to contain the largest VM you plan to migrate — plus 7 GB.
The Edit screen shows how much storage will be allotted to this VM once we spin it up.
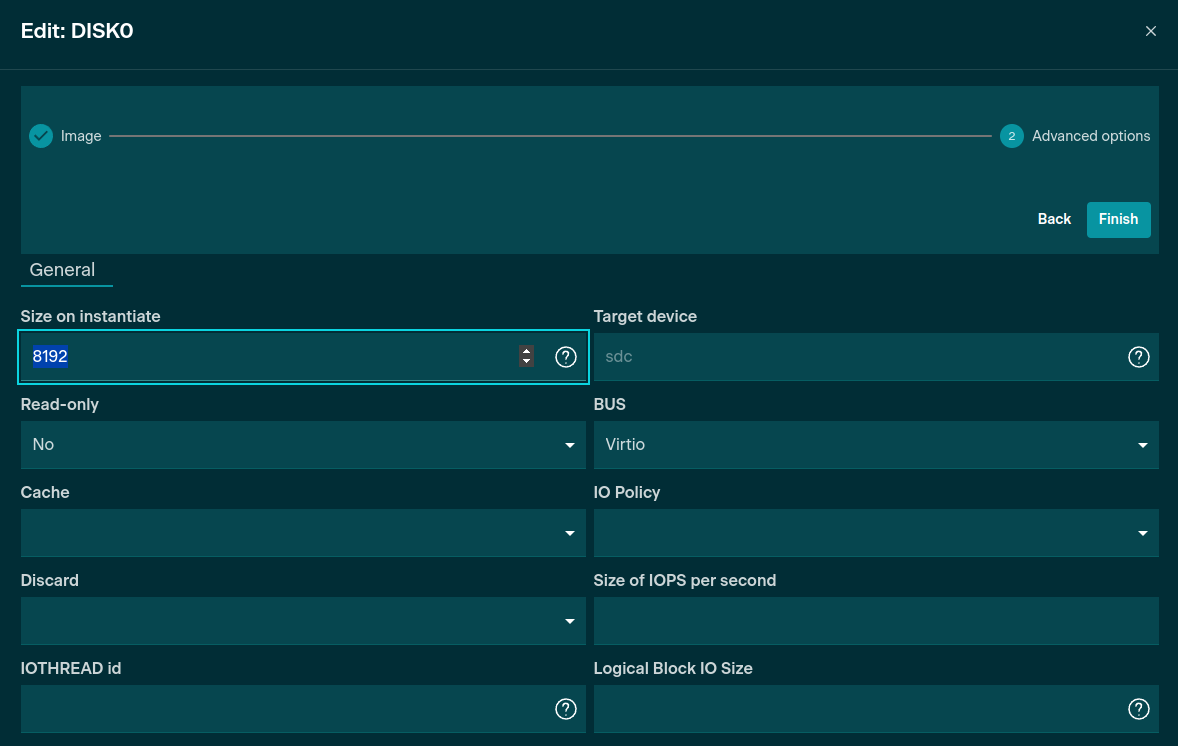
Here we see that Catalyst can expect to have 8192 MB of storage at launch, which is 8 GB. If the largest VM we expect to migrate is 4 GB then we must reserve 11264 MB, which is 4 GB plus 7 GB.
Please note: “Size on instantiate” must be 7GB larger than the volume size of the largest individual VM you want to import. You could mount external file shares and write to them instead, though the import may be slowed dramatically.
App networking
Go to the Network tab then select Attach NIC. From there, you want to connect to a network from which both the VM Squared dashboard and your ESXi host will be accessible. If routing between the two is not possible, you can multi-home Catalyst by adding multiple NICs connected to different virtual networks.
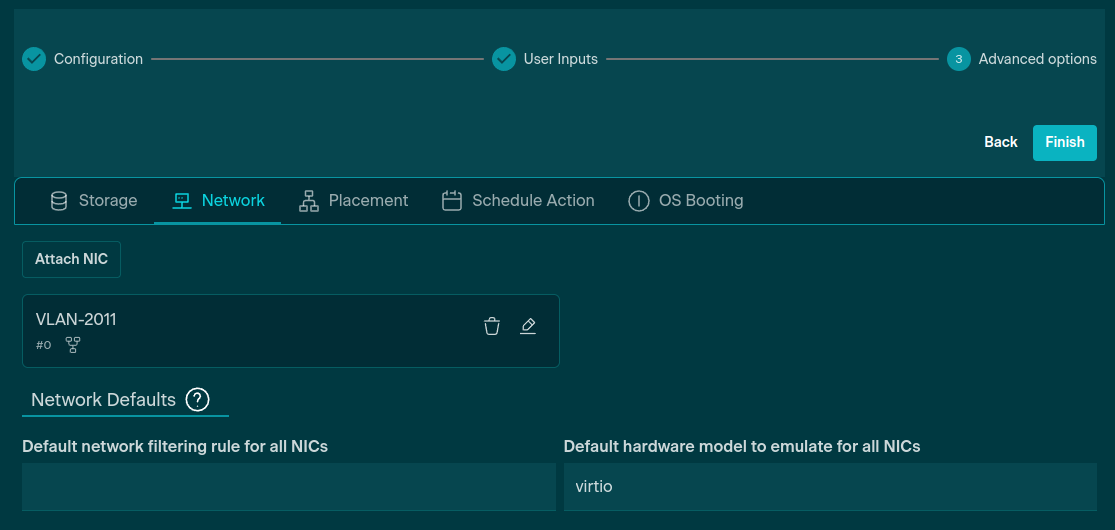
Once you select Finish, the template will deploy. Catalyst should be ready a few minutes later.
Once launched, Catalyst’s settings for the ESXi host should match what was provided during the app’s initial setup steps. These settings cannot be changed while Catalyst is running. If you suspect the ESXi connection details may need adjusting, then halt the VM and edit its template as needed before relaunching the app.
The Catalyst app is available through a browser or from the command line. The next two sections give directions for using either one.
Using Catalyst (in a browser)
Once the Catalyst app has come up in VM Squared, it should be accessible from the app’s IP address by most modern web browsers.
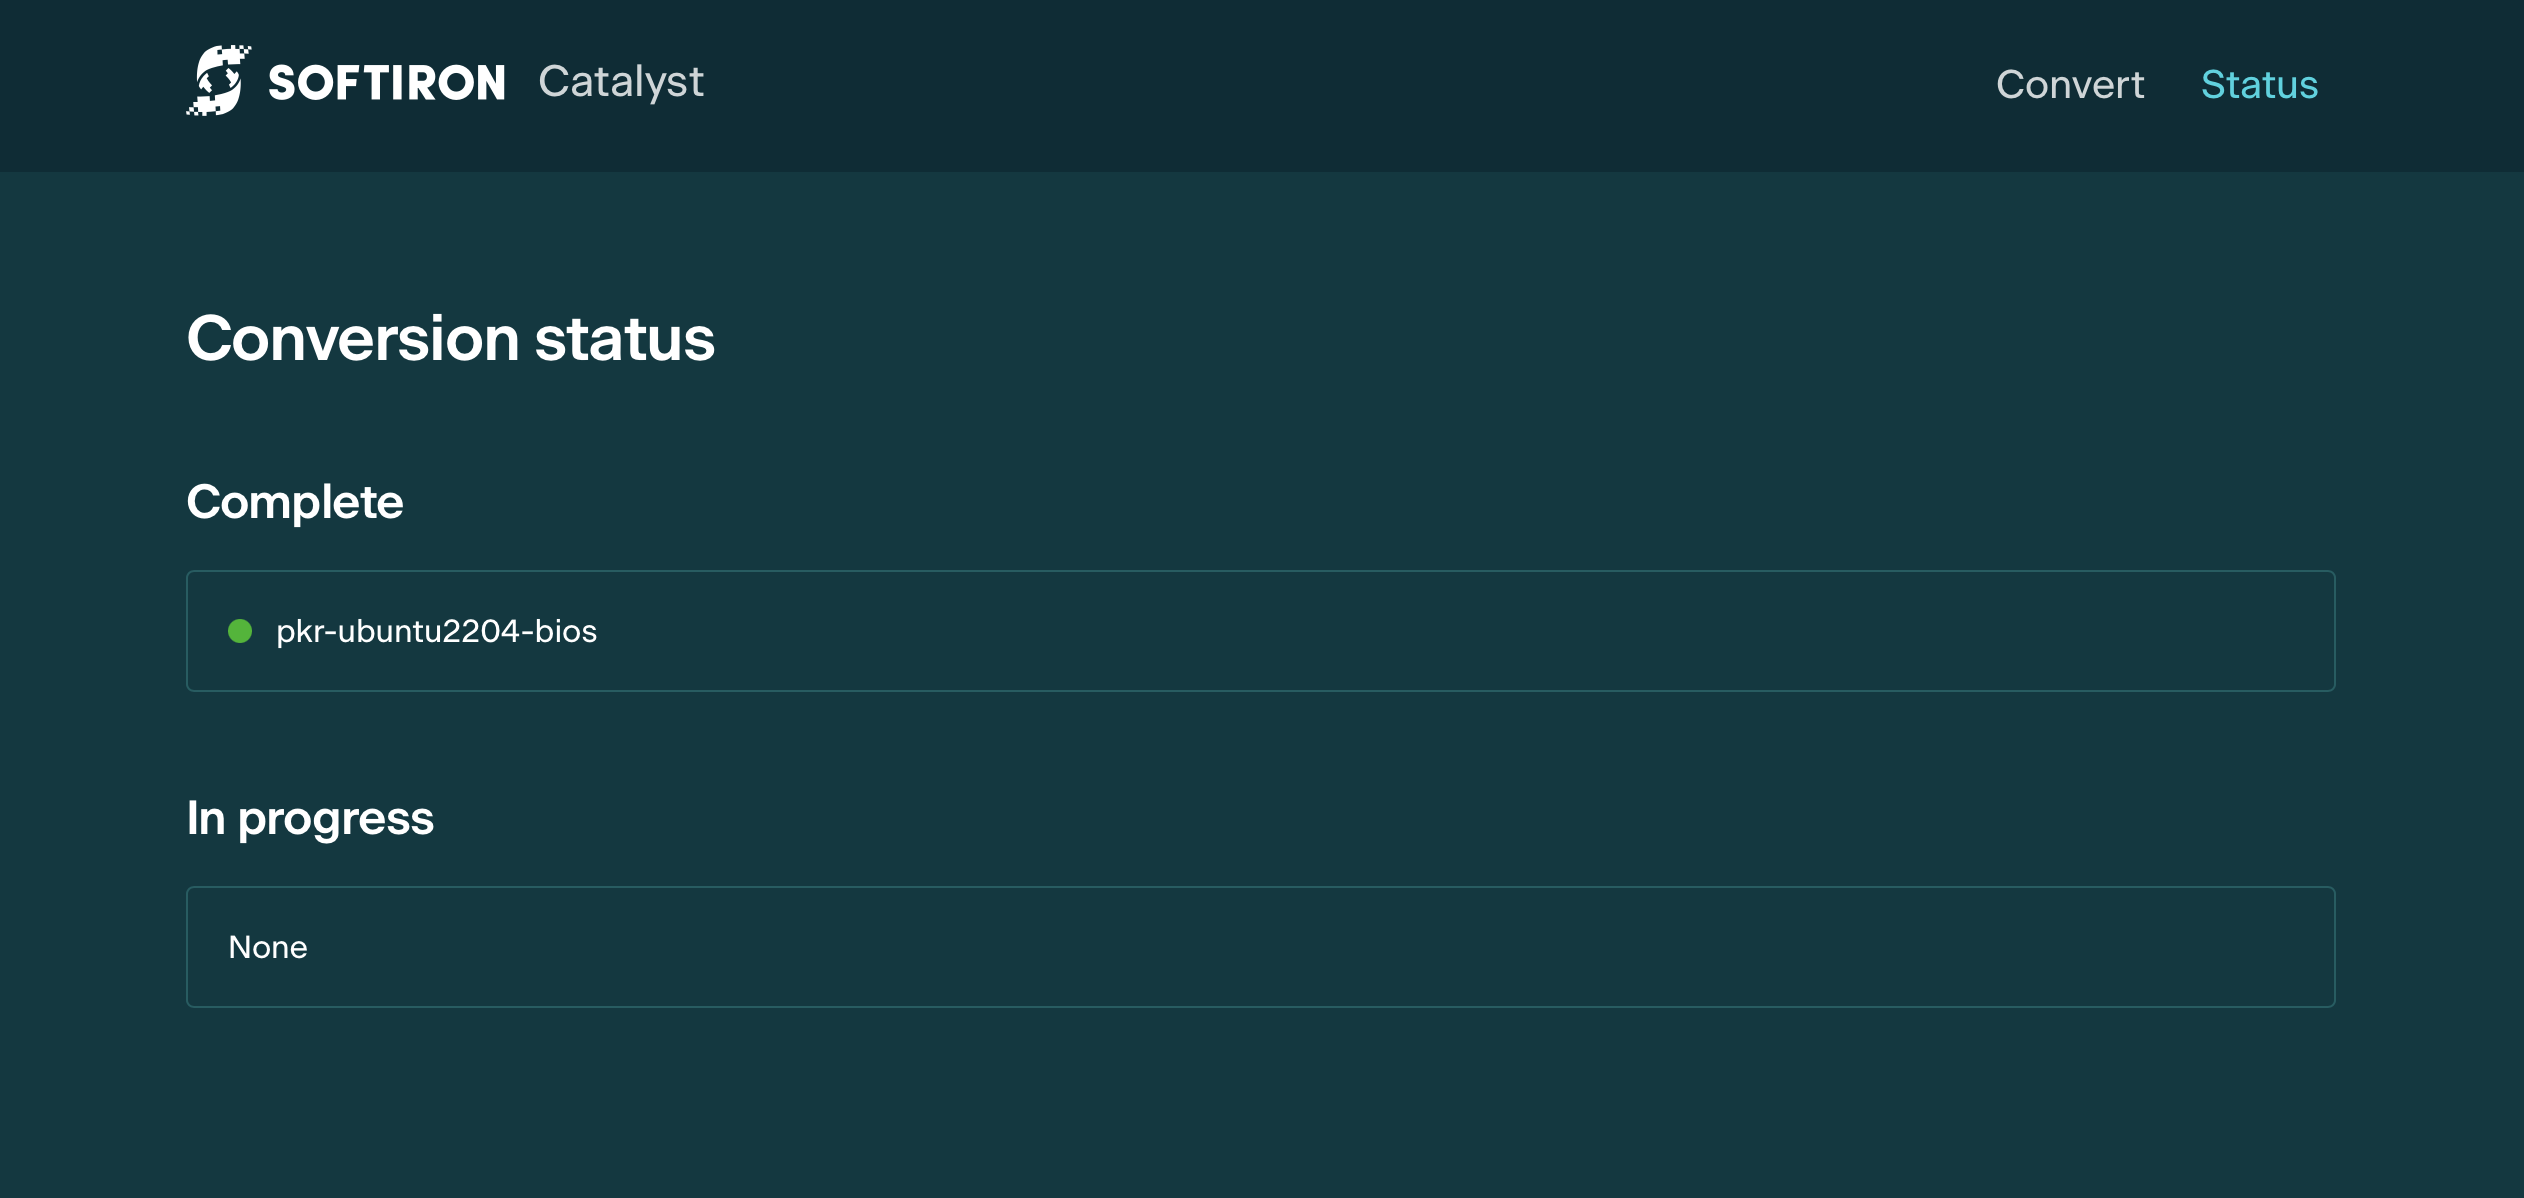
Catalyst through a browser has two main views: Convert and Status.
The Convert view displays the current dashboard and ESXi host.
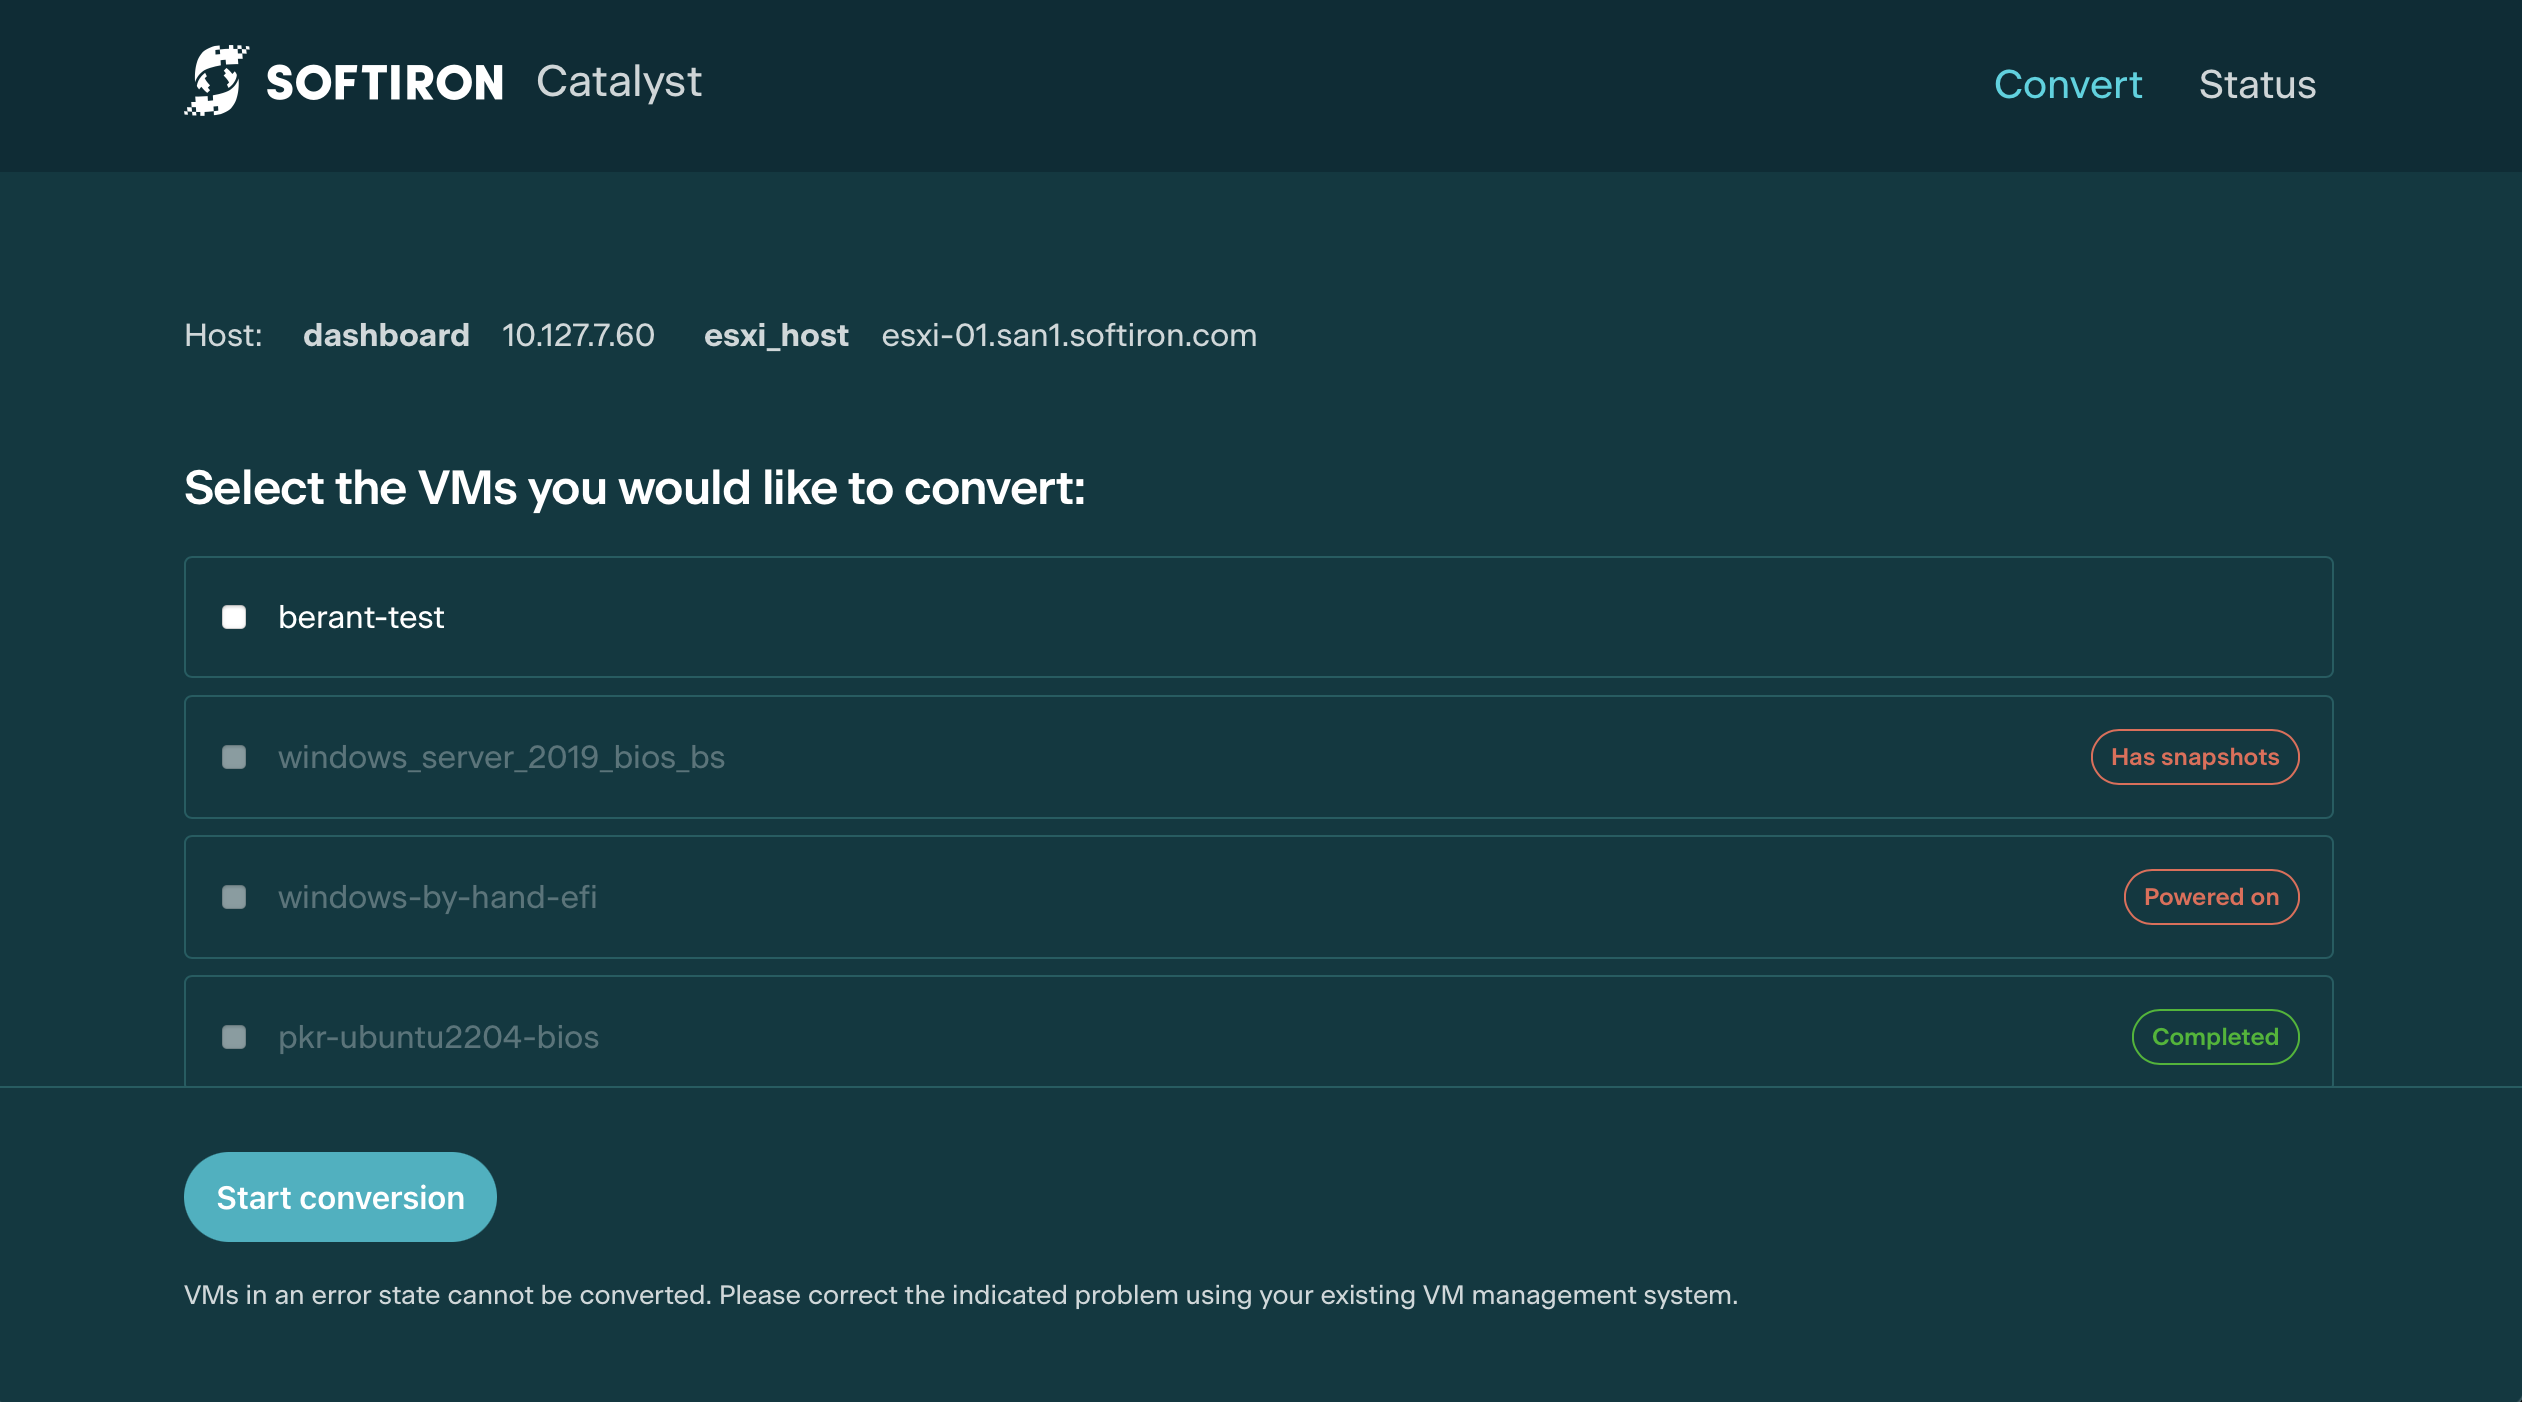
Discover available VMware VMs
The main part of the Convert view shows a list of VMs available on the ESXi host, along with the status of each one. VMs that are not eligible for conversion will be shown disabled at the bottom of the list. The reason that the VM cannot be converted will be shown to the right of the VM.
The most common reasons that a VM cannot be converted are:
- the VM is running,
- it contains snapshots of previous states, or
- it has already been converted.
If a VM is running, it must be shut down outside of Catalyst using the current VM management system before its import can begin. If the VM has snapshots, they should be removed before its import can begin.
When all errors have been corrected, the VM will be available for migration. After making a change to a VM’s state, it may be necessary to refresh the Catalyst browser window in order to see the updated VM list and status.
Import VMware VMs
To start the conversion of one or more VMs, select the checkbox beside each target VM and then select the “Start conversion” button shown in the previous screenshot, in the bottom left corner of the screen.
Once a conversion has begun, failed, or completed, the app’s view will automatically switch to show the updated status.
Using Catalyst (from the console)
Discover VMware VMs
Connect to Catalyst on the console using the root account and password shown in the ROOT_PASS attribute of your Catalyst VM.
First set the staging_dir to a filesystem large enough to contain the largest imported VM. By default Catalyst will use /tmp which puts the VM data in RAM so if you have resized the disk or connected an external filer we should use that instead. Do this by editing config.ini and setting staging_base_dir to either /root or a disk with sufficient space.
File editing can be done using vi or nano according to your preference.
To discover available VMs using the catalyst inventory command.
root@Catalyst:~# catalyst inventory
2024-05-03 14:59:56: Found 11 VM's on esxi-3.int.softiron.com
2024-05-03 14:59:56: Edit the following file to verify VM's to be converted:
2024-05-03 14:59:56: /root/esxi-3.int.softiron.com/vmx_list.txt
Edit the vmx_list.txt file and remove all lines except the VMs you want to migrate. These lines contain the filesystem addresses of your VMs on the ESXi host and each filename should match its VM name in vCenter.
Import VMware VMs
To begin importing copies of the VMs, call catalyst convert. Again, each original VM’s data will remain untouched. You are only making a copy of the original.
If the state of a VMs virtual disk were to change during the migration process, the copy could be corrupted. Catalyst requires VMs to be powered off in order to consider copying them.
You can view the process status on the console, or look at more detailed information by following the output of catalyst.log which is located in the same directory as vmx_list.txt
# catalyst convert
2024-05-03 15:01:05: converting ubuntu1.vmx
2024-05-03 16:38:57: conversion complete
2024-05-03 16:38:57: converted output dir: /root/staging/esxi-3.int.softiron.com/root/staging/esxi-3.int.softiron.com/tmprk3hflkg/ubuntu1
2024-05-03 16:38:58: staging converted vmdata for ubuntu1
2024-05-03 16:39:39: staging complete
2024-05-03 16:39:39: creating image ubuntu1-sda on vmsquared-11.int.softiron.com
2024-05-03 16:39:40: image creation complete with id: 4
2024-05-03 16:39:40: setting image ubuntu1/ubuntu1-sda permissions in vmsquared-11.int.softiron.com
2024-05-03 16:39:40: setting image ubuntu1/ubuntu1-sda ownership in vmsquared-11.int.softiron.com
2024-05-03 16:40:21: parsing ubuntu1.vmx
2024-05-03 16:40:21: converting ubuntu1.tmpl
2024-05-03 16:40:21: template creation complete
2024-05-03 16:40:22: VM ubuntu1 complete
Once the import is complete you will have a VM Template created for each VMware VM with the same name, disk contents and network naming.
Start imported VMs
After importing the VM go to VM Templates and click the Deploy button to start the imported VM.
Finishing imports and securing ESXi
Once you’ve finished importing virtual machines from ESXi, we strongly recommend disabling the SSH service if it’s not typically needed.