
We’ve designed Glasshouse (our browser-based dashboard for managing HyperCloud) to streamline the setup of LXC containers so that it’s a straightforward process for anyone on your infrastructure team. Here’s a preview of the process of setting one up, available in the next HyperCloud update.
First, add an LXC host
To run an LXC container, your system must have at least one LXC host. One node can serve multiple roles, but each role will need to be configured as belonging to separate hosts.
To enable the hosts to run LXC containers, modify the /etc/hosts file on the dashboard as follows:
# cat /etc/hosts
127.0.0.1 localhost
10.0.1.0  hypercloud-storage
10.0.1.0  hypercloud-storage-direct
::1 localhost
127.0.0.1 hypercloud-dashboard
10.0.253.218 hypercloud-storage-54550000010a
10.0.0.1 hypercloud-storage-1
10.1.253.212 hypercloud-compute-kvm-545500000104
10.1.253.214 hypercloud-compute-kvm-545500000106
10.1.253.214 hypercloud-compute-lxc-545500000106
Then add the host.
hypercloud host create hypercloud-compute-lxc-545500000106 --vm lxc --im lxc
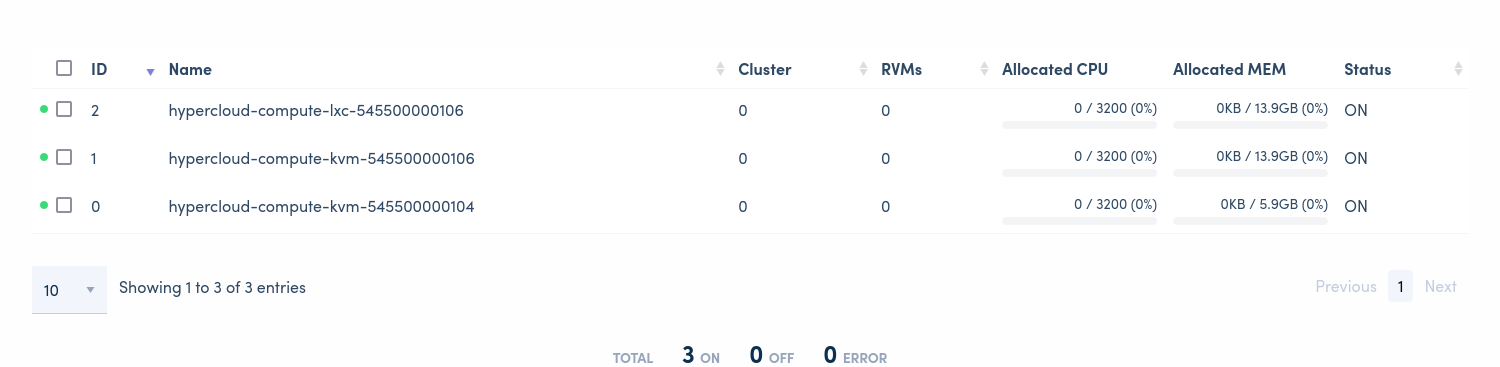
The host status can be verified in the Glasshouse web UI, or with the cli command hypercloud host list.
In Glasshouse, the host will look something like this:
Instantiate the container
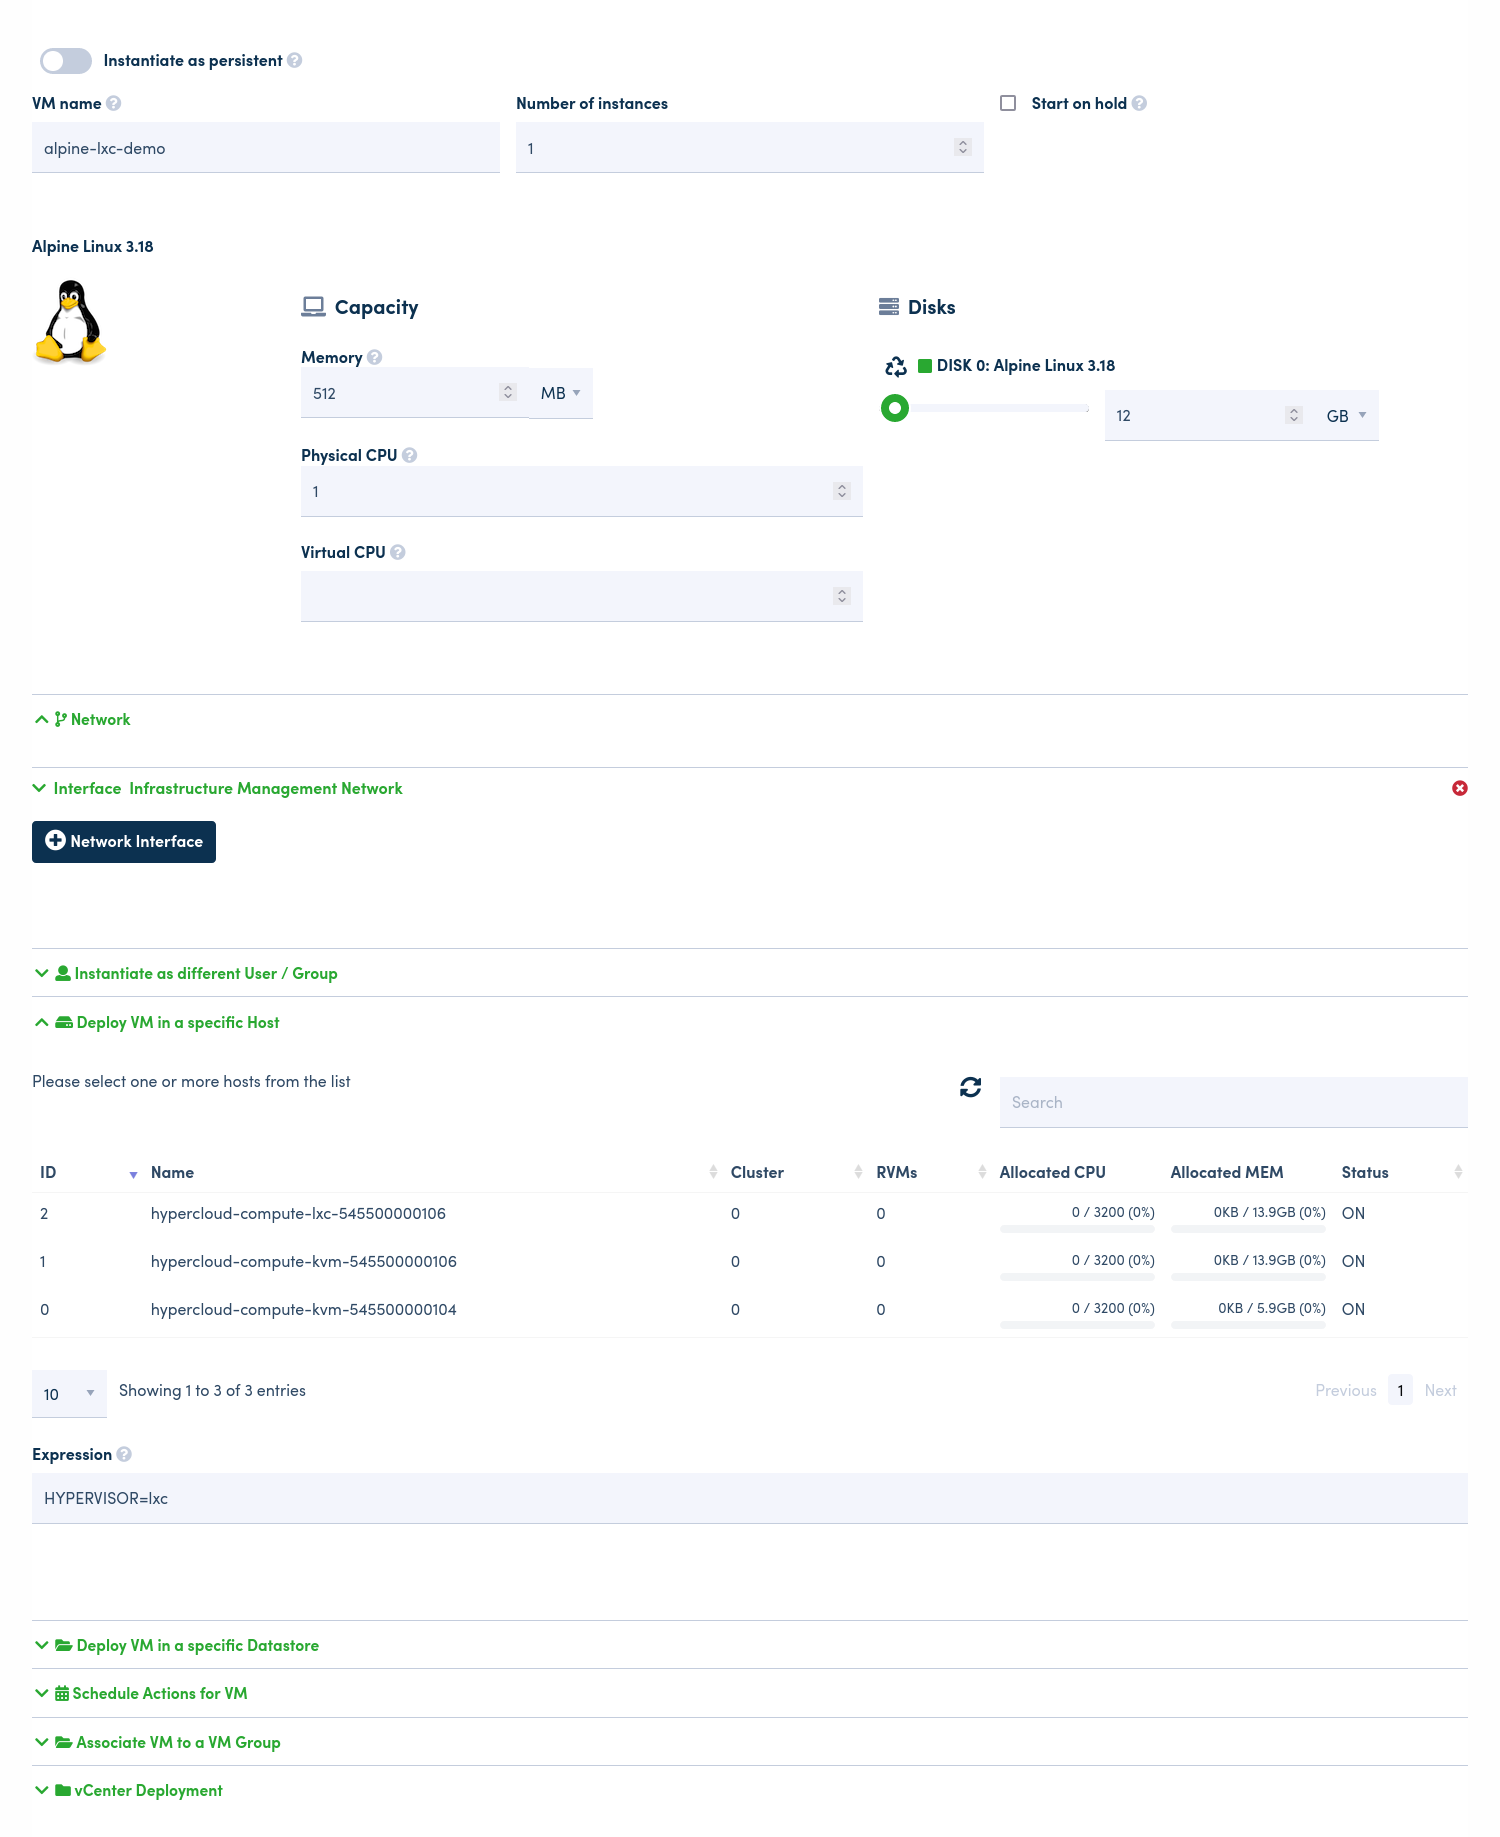
Any VM template can be instantiated as an LXC container. Here, I have set my VM template to use an image from Amplifier, HyperCloud’s image and appliance marketplace. All images in the marketplace have a unique ID, viewable in the Glasshouse Dashboard - in this case, 6.
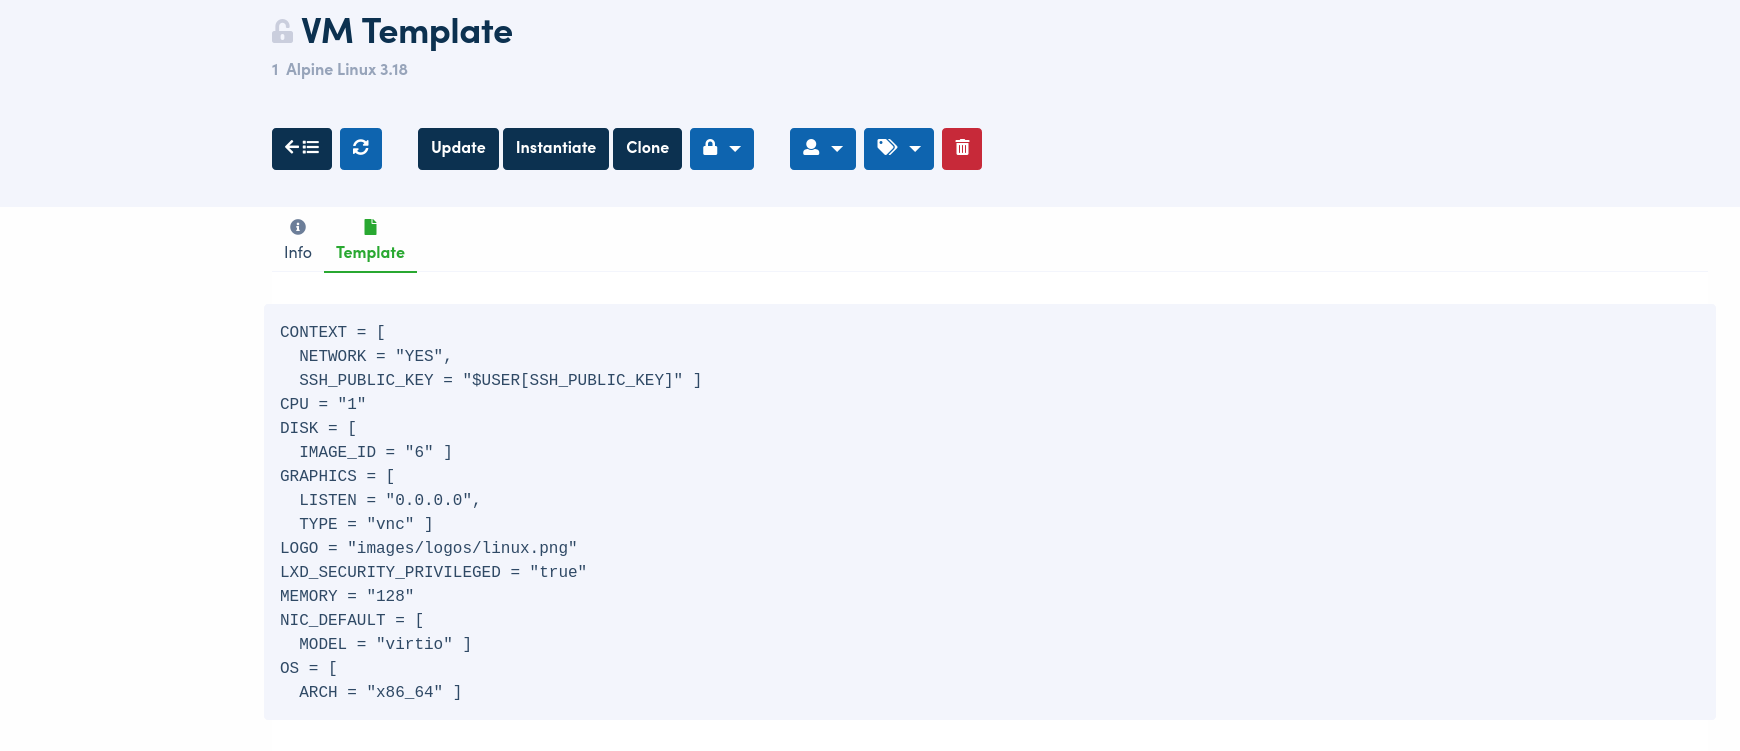
To run the template as a container, the instance needs to be scheduled to an LXC node. This is done by editing the template to add the HYPERVISOR=lxc expression to the SCHED_REQUIREMENTS attribute of the instance.
If you’d like to ensure that the values you have specified are always used with this particular template, you can save your new configuration to the VM template.
In Glasshouse, you can make these changes via the instantiation form (see the following screenshot) in the Deploy VM in a specific host section of the VM template settings screen seen in the screenshot above.
Please note: So long as the root filesystem is at the end of the disk, the disk and filesystem can be resized. This should be the case for all of the images in the Amplifier marketplace. Only XFS and the ext family of filesystems are supported.
The other values (for example, the network interfaces and placement options) are used in the same way as you would with KVM-based virtual machines. One limitation, however, is that containers do not allow adding additional disks or network interfaces after the container is created. This is a limitation of the underlying technology, for now.
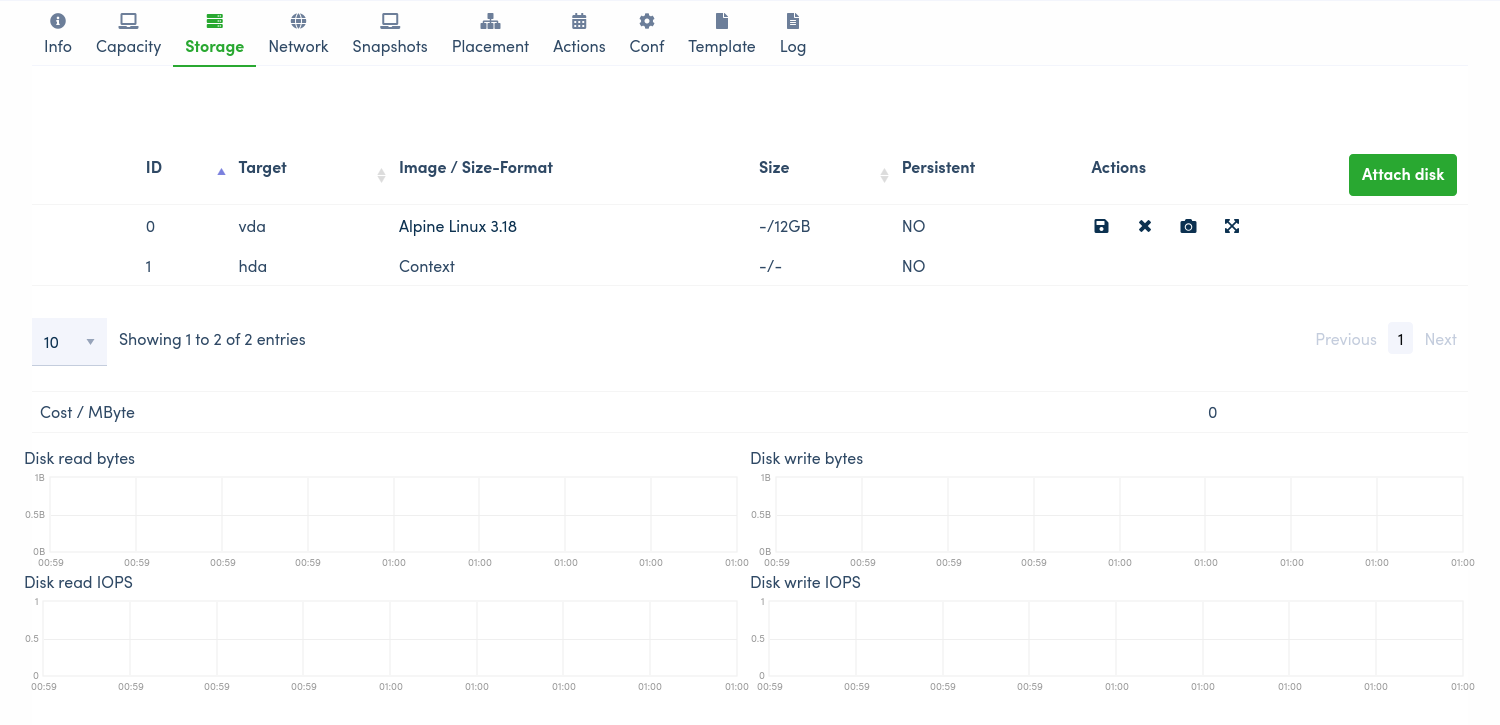
Create a disk snapshot (optional)
Once the container is provisioned, a disk snapshot can be created if needed. To take a disk snapshot, the container must be temporarily stopped.
The snapshot can be created in the Storage tab in the VM information section of HyperCloud’s Glasshouse web UI, as seen below.
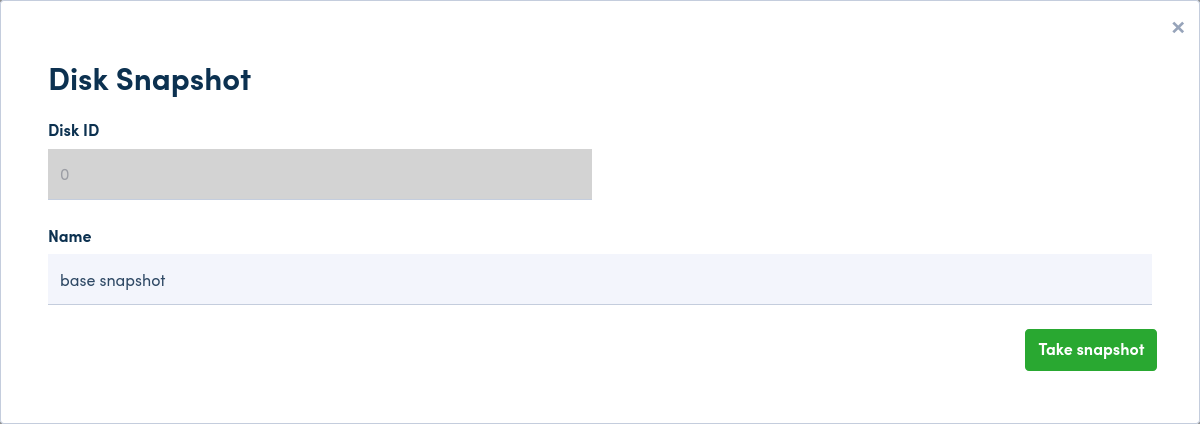
All snapshots must be given a name. A modal window with a name prompt will appear in the UI after clicking on the camera icon to create the snapshot.
Once at least one snapshot exists, reverting the disk to a snapshot is done from the same Storage tab as above.
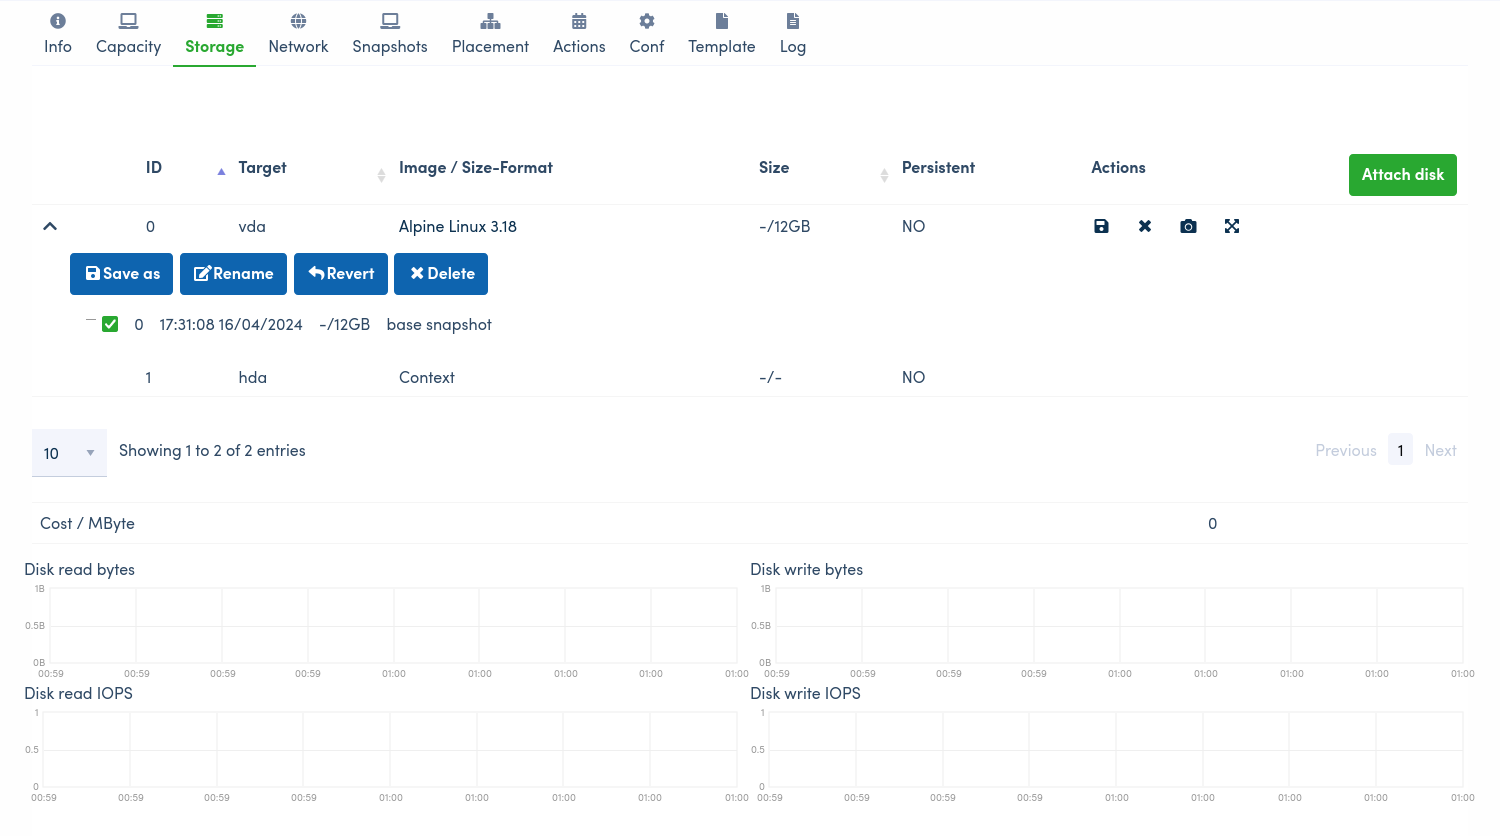
To successfully revert the system, the VM will need to be in the POWEROFF or SUSPENDED state; otherwise, an error will occur and no reversion will be made.
You can also use the Actions tab on the VM information screen to trigger snapshots of either the individual disks or the whole VM (the latter is for KVM only). A scheduled action can be created to enact a VM command on a one-off or periodic frequency, which includes taking snapshots.
If you are curious about other aspects of managing containers in the HyperCloud Glasshouse GUI, let us know!