
Leading container ecosystem Kubernetes provides a full set of development, testing and production tools for container-based apps. Advanced network and storage can also be run directly on Kubernetes. In this post, we’ll show you how to manage that complexity and stay secure, with Rancher on HyperCloud, our full stack true private cloud platform.
Faster Kubernetes
Kubernetes is the most popular container orchestration tool by far. As a traditional operating system schedules and manages processes, Kubernetes acts to schedule and manage containers.
Rancher cuts through the complexity of Kubernetes setup and administration with clear and efficient tools to install, upgrade and manage multiple Kubernetes clusters, providing rapid access to resources for application teams. These qualities strongly match HyperCloud, which delivers private cloud just as easy to use as public cloud, streamlining access and management of cloud resources and enabling users to easily deploy and scale virtual machines (if you’re only interested in that last part, then VM Squared will be your go-to). Putting the two together is a recipe for cloud-native success!
A secure Kubernetes private cloud
So, how do we quickly set up Kubernetes, while also satisfying our security requirements?
Rancher and OpenSUSE offer FIPS 140 cryptographic certification for TLS algorithms and CIS security hardening support in the RKE2 Kubernetes distribution. Along with the SUSE Linux Enterprise Server support for FIPS 140 and Common Criteria this supports operation in highly secure environments with HyperCloud. HyperCloud also provides FIPS-140 compatible crypto and operates in accordance with FISMA High and FedRAMP High as well as DoD SRG IL-5 security standards.
Secure environments can have varying requirements so we won’t endeavor to create a one-size-fits-all deployment here. Those working in such environments will recognise the treadmill of security compliance. For the sake of brevity we will merely illustrate that the features needed to achieve compliance are available in this suite of products.
Key to ensuring compliance is vetting and standardizing the deployment parameters. Rancher fulfils this role; coordinating the deployment, configuration and upgrade of Kubernetes clusters.
Lightweight edge
At the edge the size of deployments needs to be reduced. VM Squared can run with only three nodes and strongly correlates with edge compute requirements. VM Squared provides replicated storage for and firewalling for VMs, though as it is a software-only product, it doesn’t offer the optimized and secure hardware platform of HyperCloud. To get the most out of our edge cluster we can pair VM Squared with K3S.
K3S provides a lightweight high-efficiency Kubernetes distribution suitable for edge workloads where HyperCloud’s hardware efficiency makes it a strong candidate for cloud at the edge. K3S reduces Kubernetes deployment size by integrating common functionality normally provided by numerous containers into a single binary, making is simple to install and manage for developers as well as lightweight deployments.
this post focusses purely on HyperCloud features, for a similar deployment on VM Squared check our new post.
Bringing Rancher onto the scene
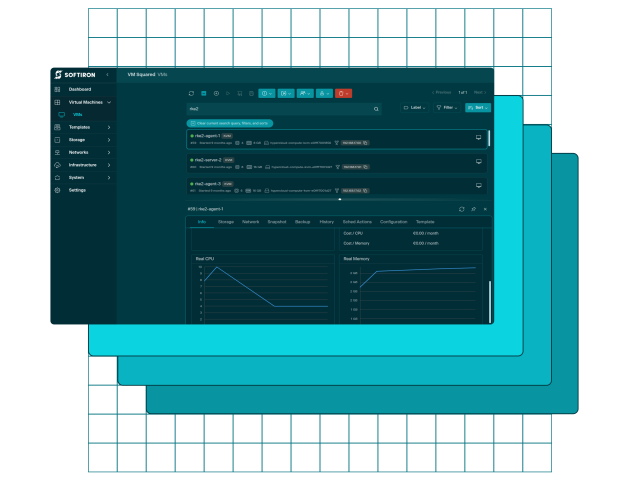
To get started we need to stand up Rancher as a service to manage the deployment of our Kubernetes clusters.
- Ensure that Amplifier, SoftIron’s image and appliance marketplace, is enabled on your HyperCloud cluster.
- Download the Rancher service from Amplifier.
- Enable Rancher service by:
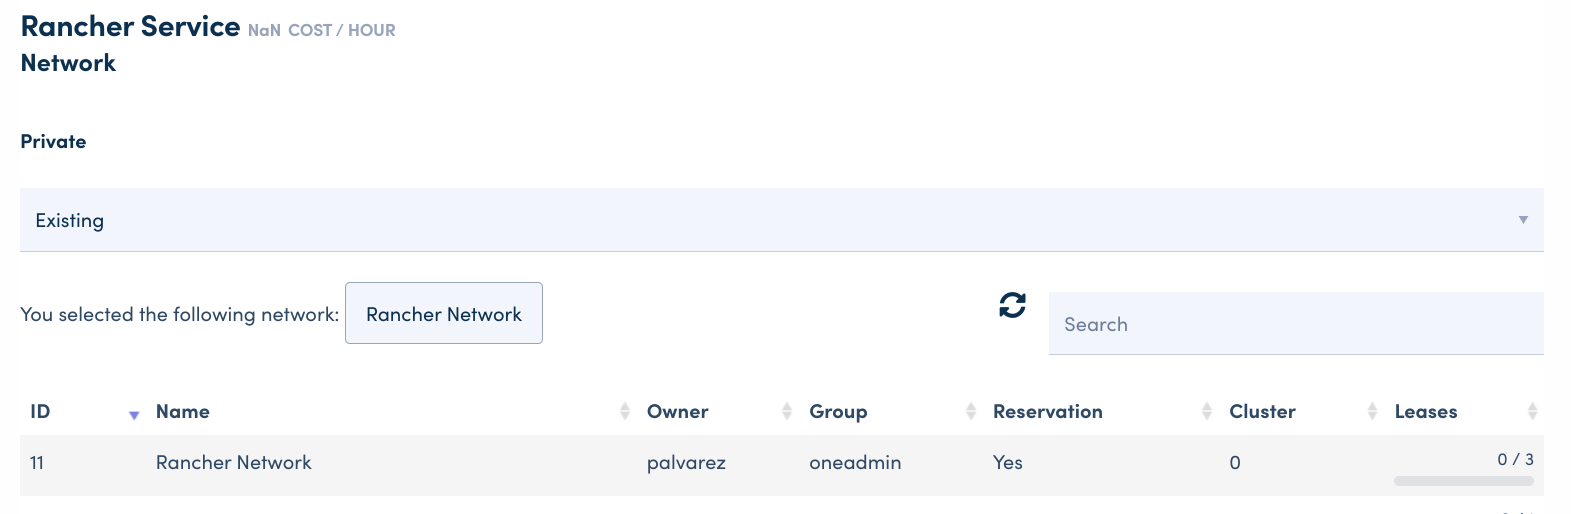
- Selecting a network.
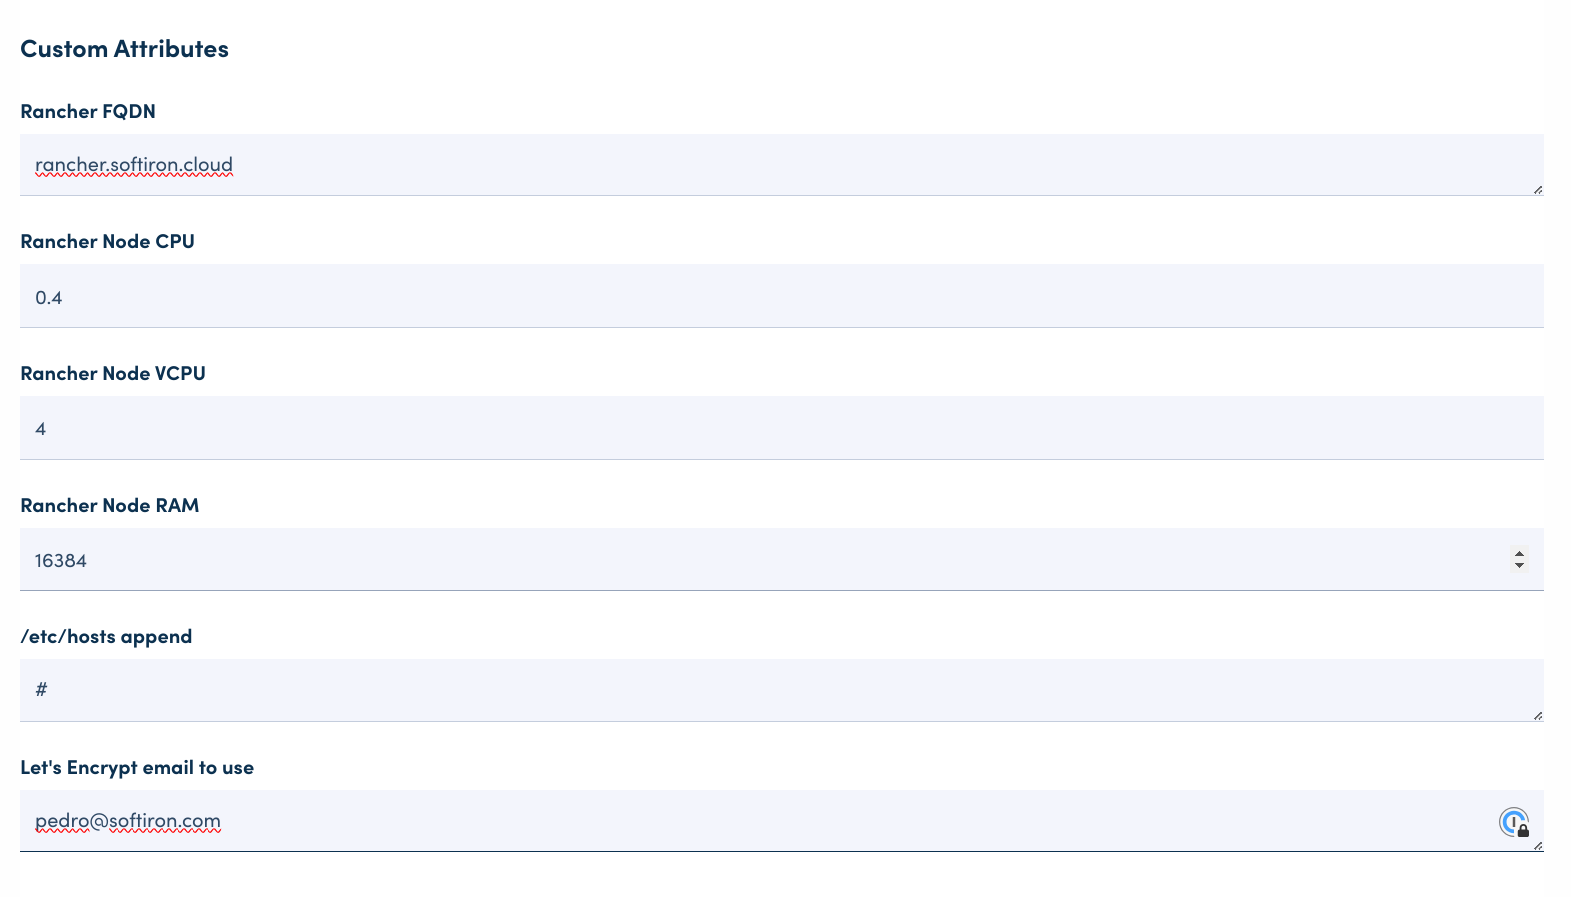
- Enter FQDN.
- Adjust resources if needed (CPU, VCPU, RAM).
- Set an email address to register with LetsEncrypt.
- Optionally add extra entries on /etc/hosts.
- Select the appropriate network connectivity for your service:
- Complete the custom attributes to give your service a FQDN which will be load-balanced across the VMs. Either setup an external LB or create a round-robin DNS entry pointing to all three VMs. Advanced users may wish to use the kube-vip or metalLB projects to provide Kubernetes-based load balancing.
If you are not able to add external DNS you can utilize the /etc/hosts append feature with entries referring to FQDN you used and the IPs allocated to the VMs like this:
172.16.100.11 rancher.mydomain.net
172.16.100.12 rancher.mydomain.net
172.16.100.13 rancher.mydomain.net
Set the physical and virtual CPU limits for the service. Physical CPUs will be reserved for this service so avoid setting a high limit. If you are testing this you can add extra hosts entries to avoid external DNS.
Click finish and VMs will be deployed, forming a Kubernetes cluster. Wait a few minutes for the cluster to come online.
- Once deployed you can find the
kubeconfigand other details in the Attributes of each cluster VM.
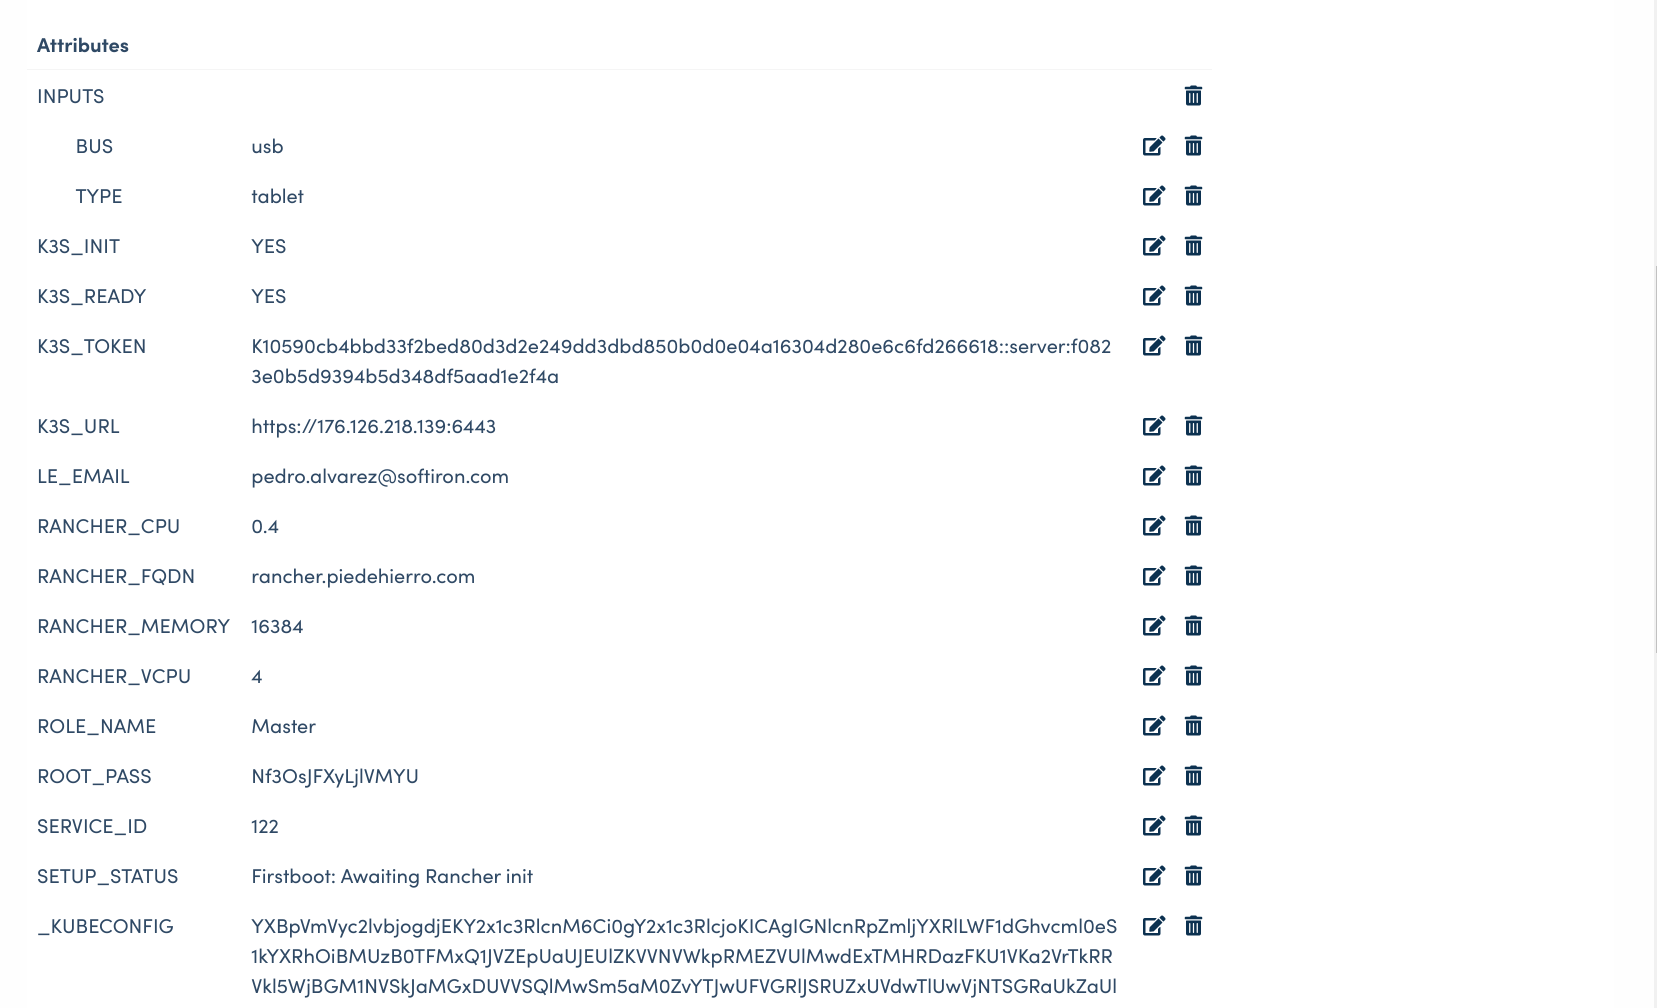
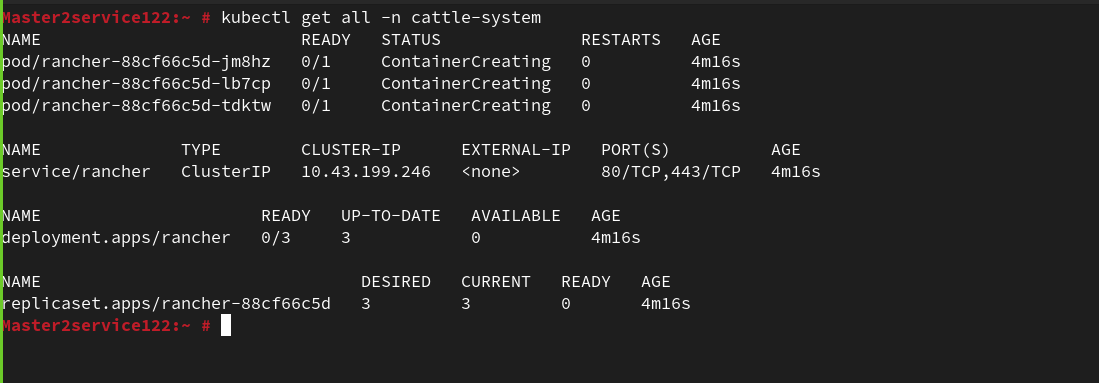
SSH to one of the VMs and you can use
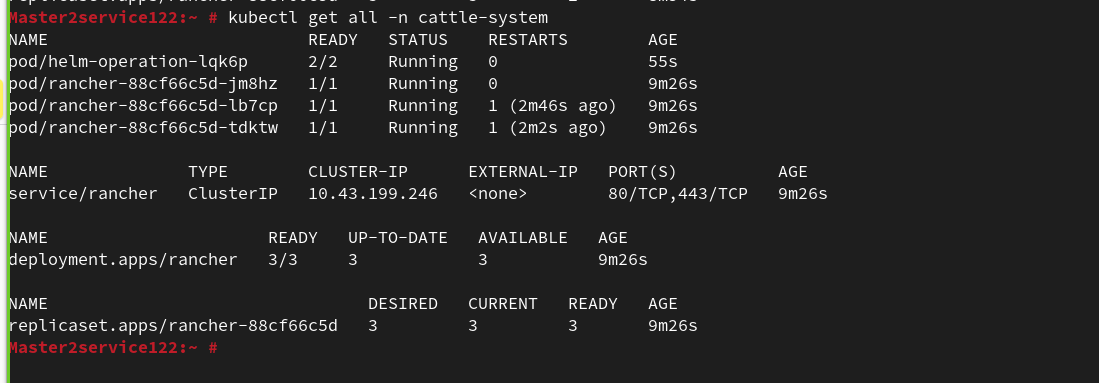
kubectlto validate the cluster status. Wait for all Pods to be Running. You can also view the status of in the HyperCloud UI via theSETUP_STATUSAttribute.Rancher deploying
Racher ready
Attribute
SETUP_STATUSshows complete.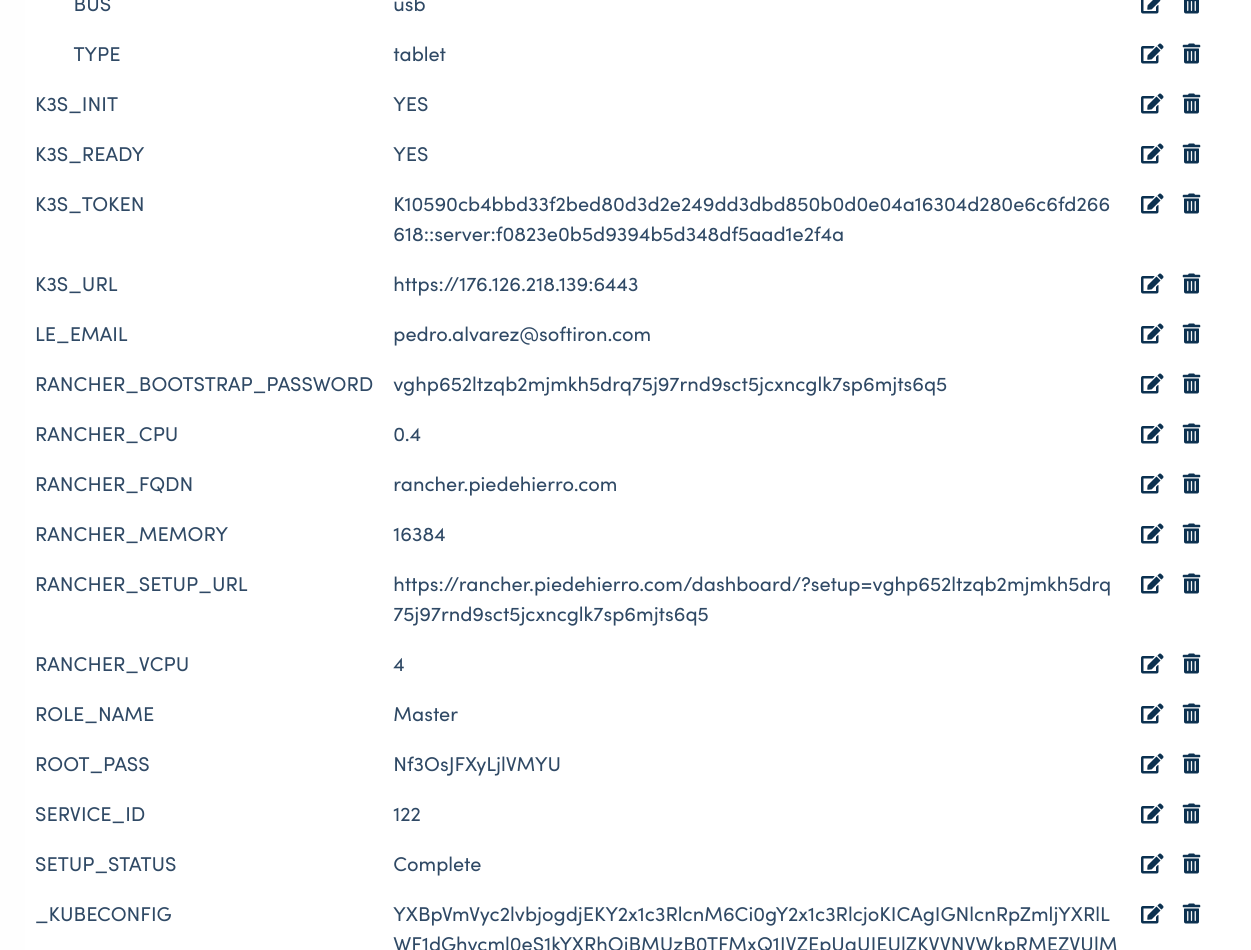
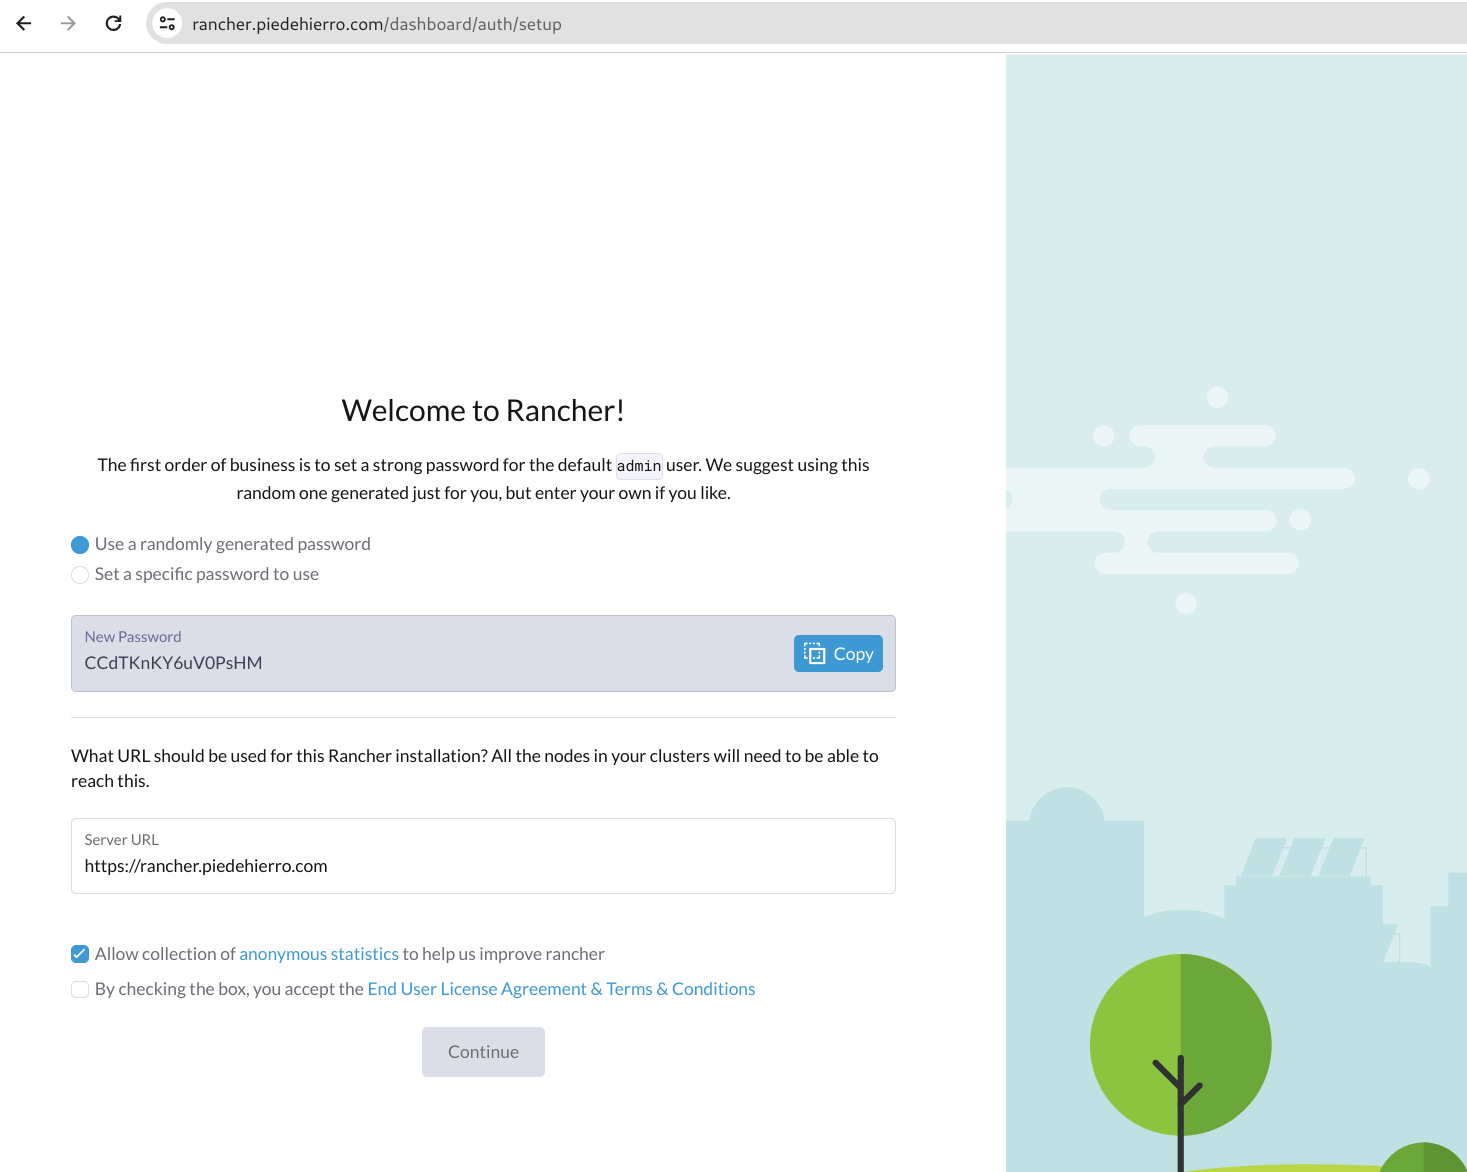
Visit the Rancher web UI using the value of
RANCHER_FQDNprovided in the Service attributes and set the admin password.Set the admin password
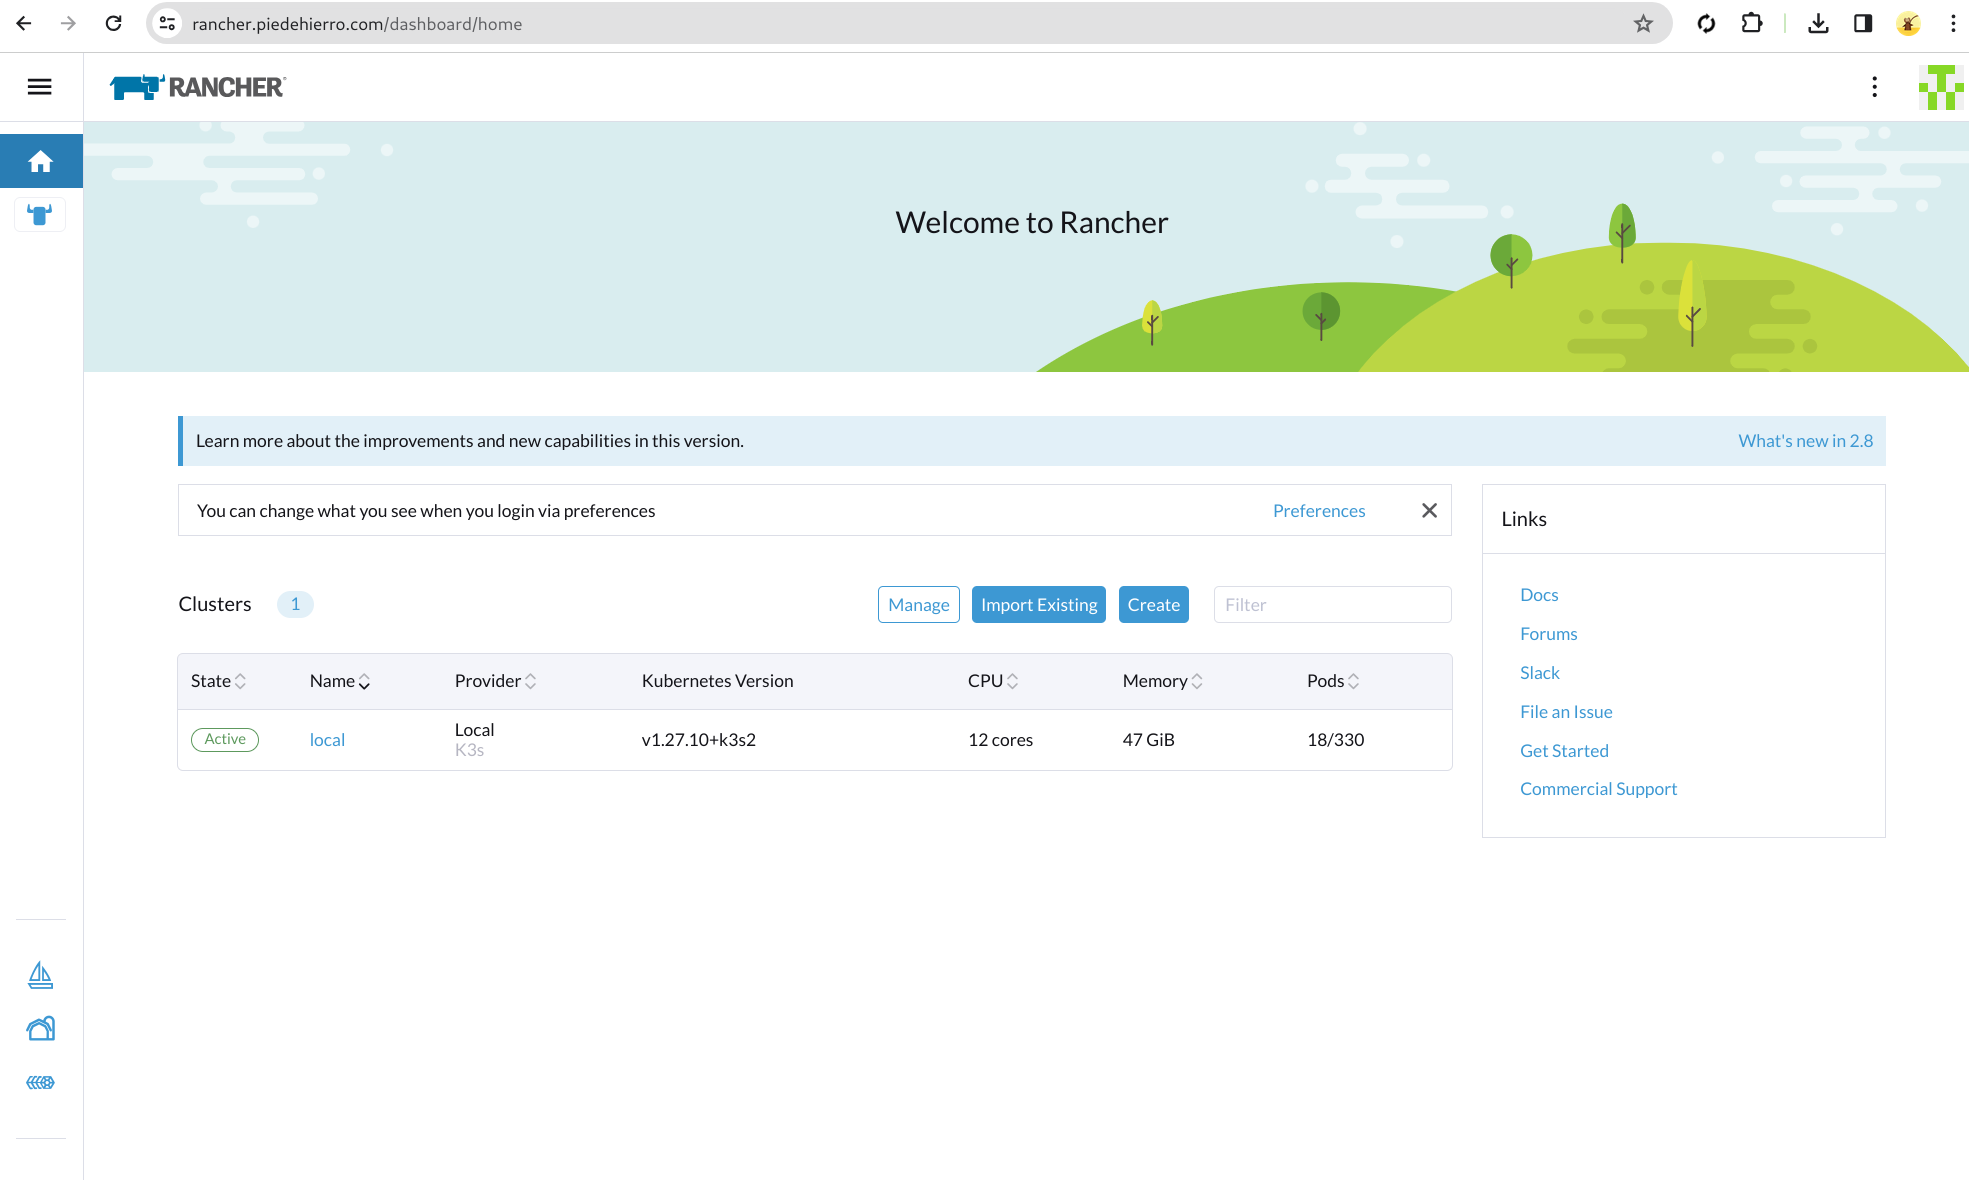
View of main cluster in Rancher UI
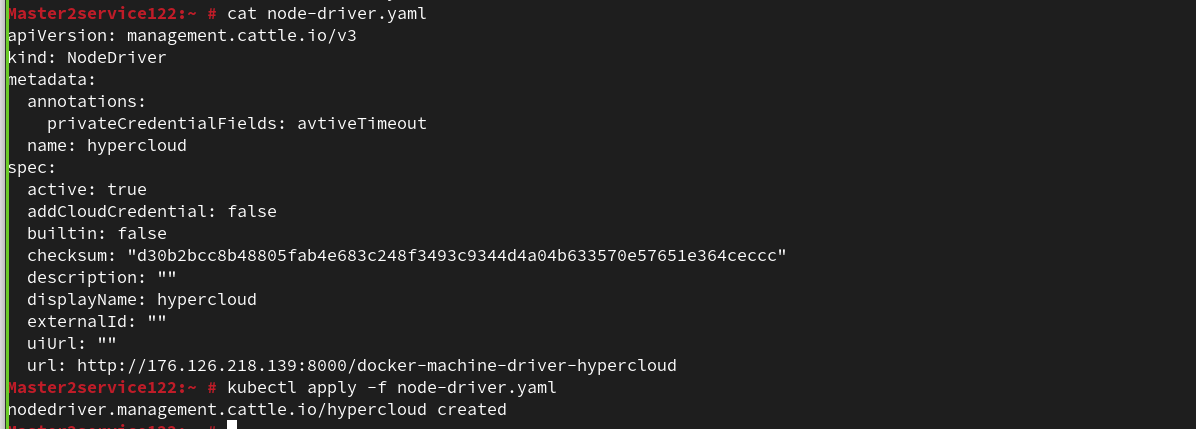
Install the HyperCloud node driver. (The driver download link is currently only available to HyperCloud customers.) Once you have obtained the driver download, install the file using the following resource:
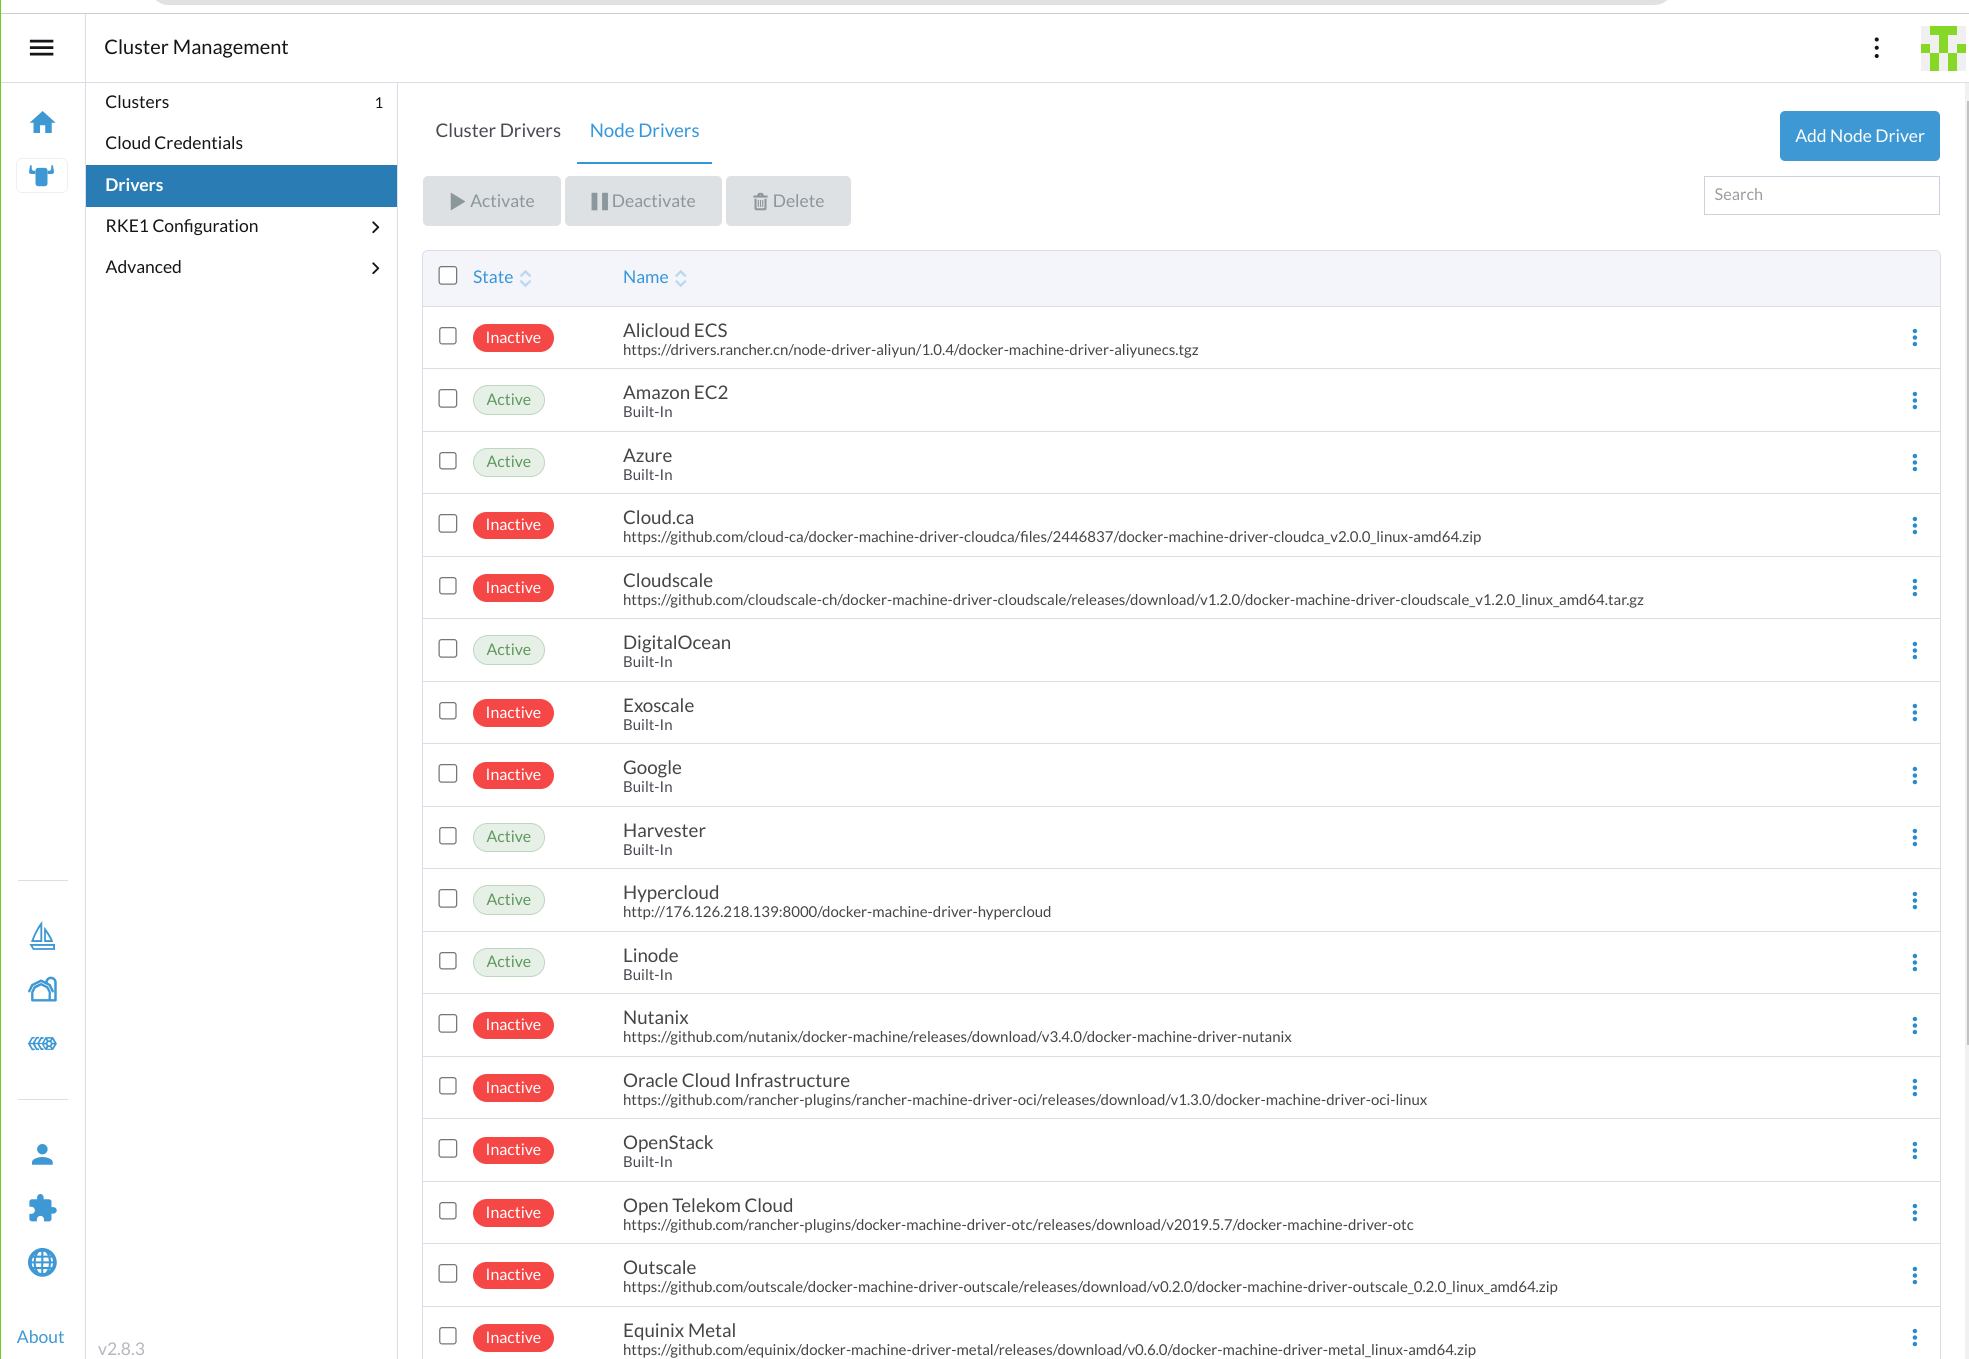
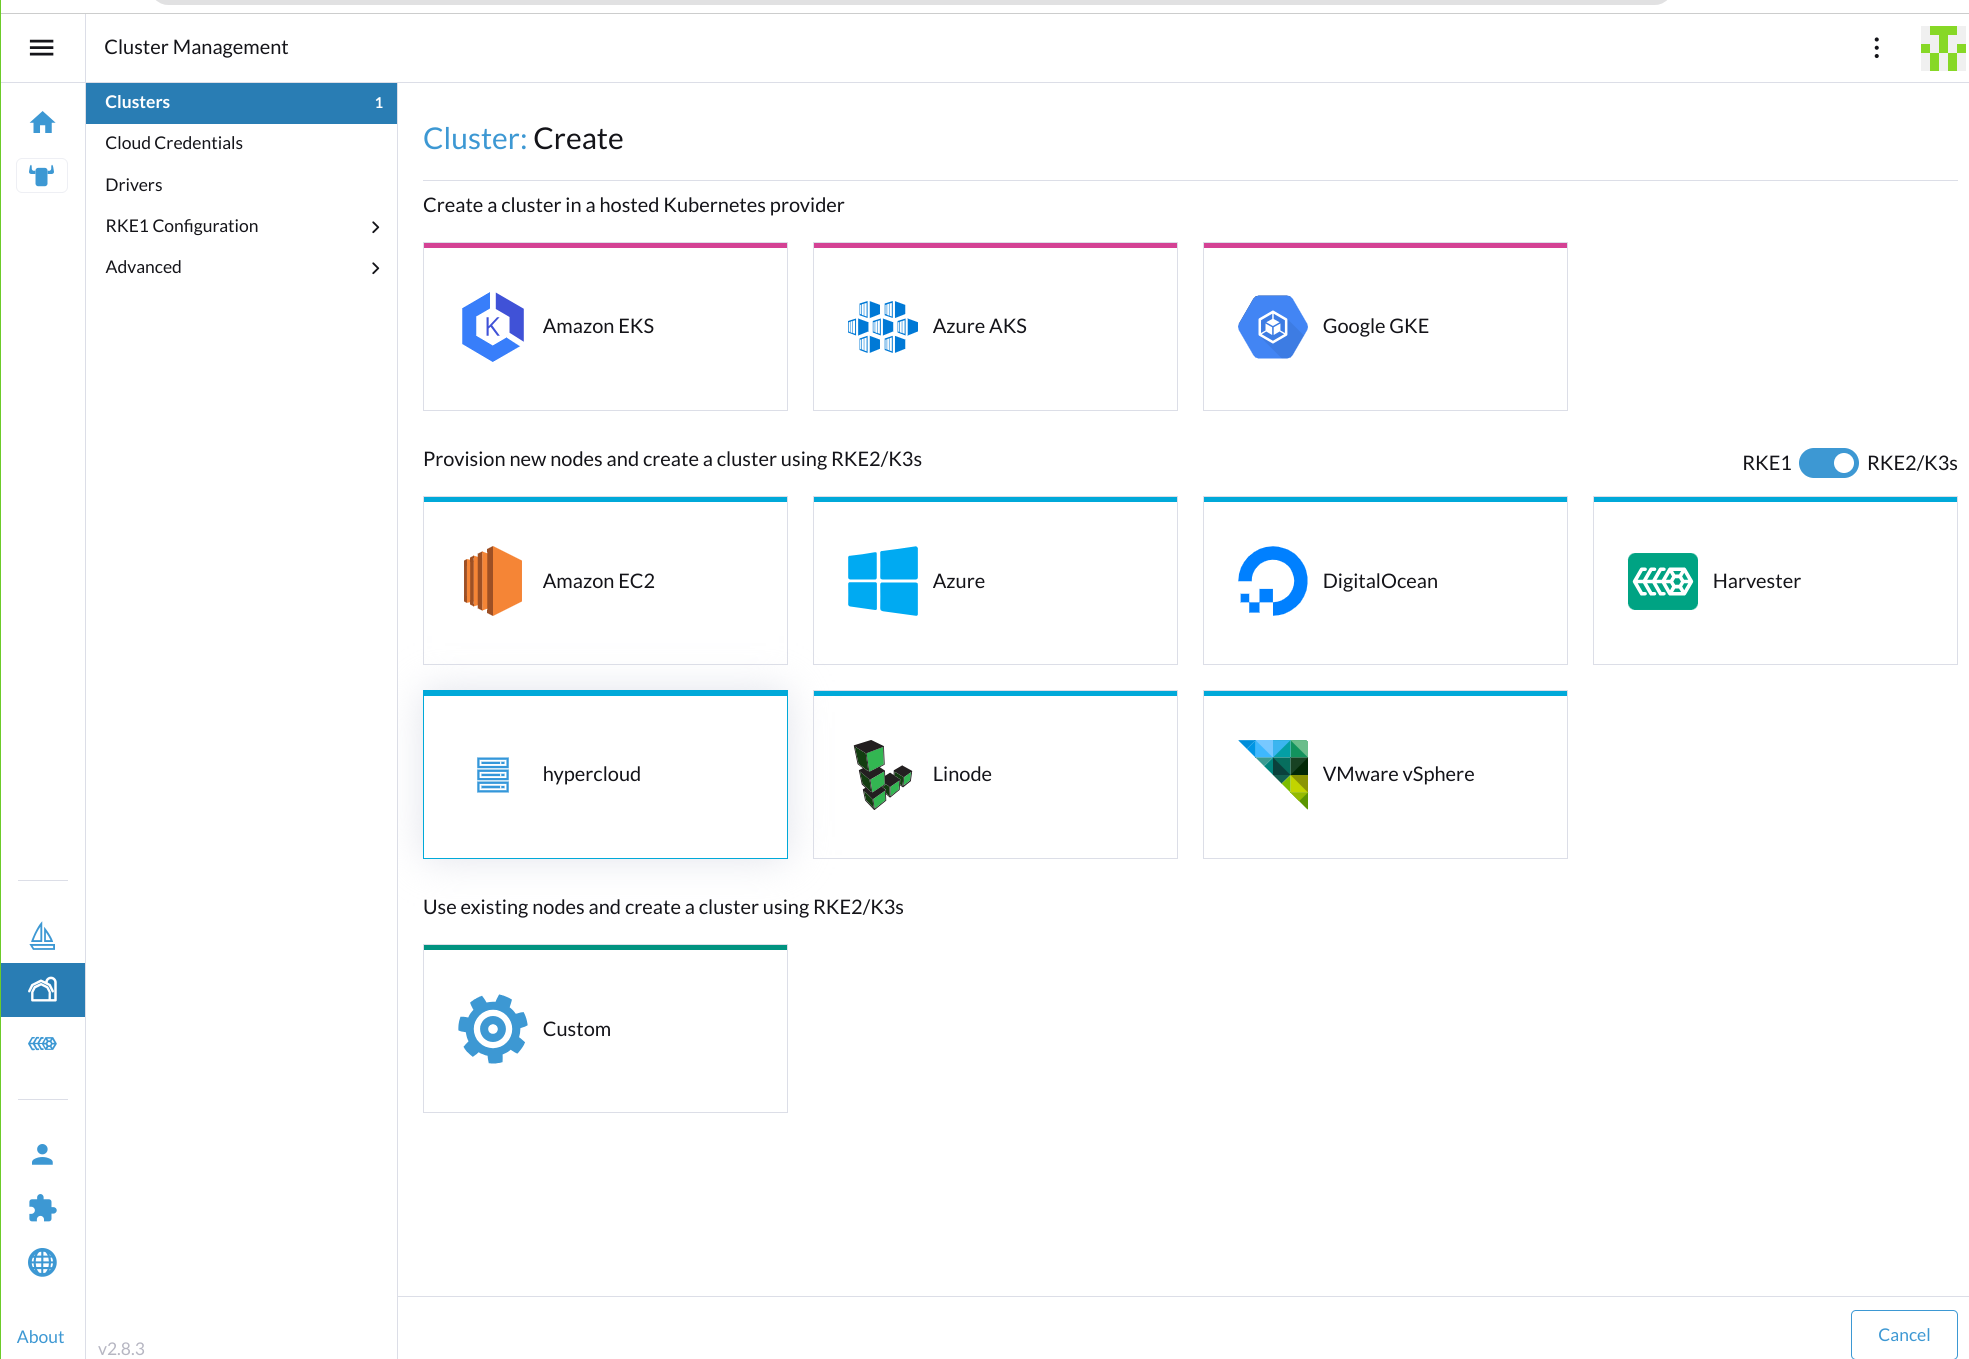
Create Rancher workload cluster on HyperCloud. Now you have the node driver installed you are able to create, upgrade and delete additional Kubernetes clusters directly from the Rancher UI.
Choose the HyperCloud cluster type
Configure credentials for HyperCloud. Leave values blank and click continue.

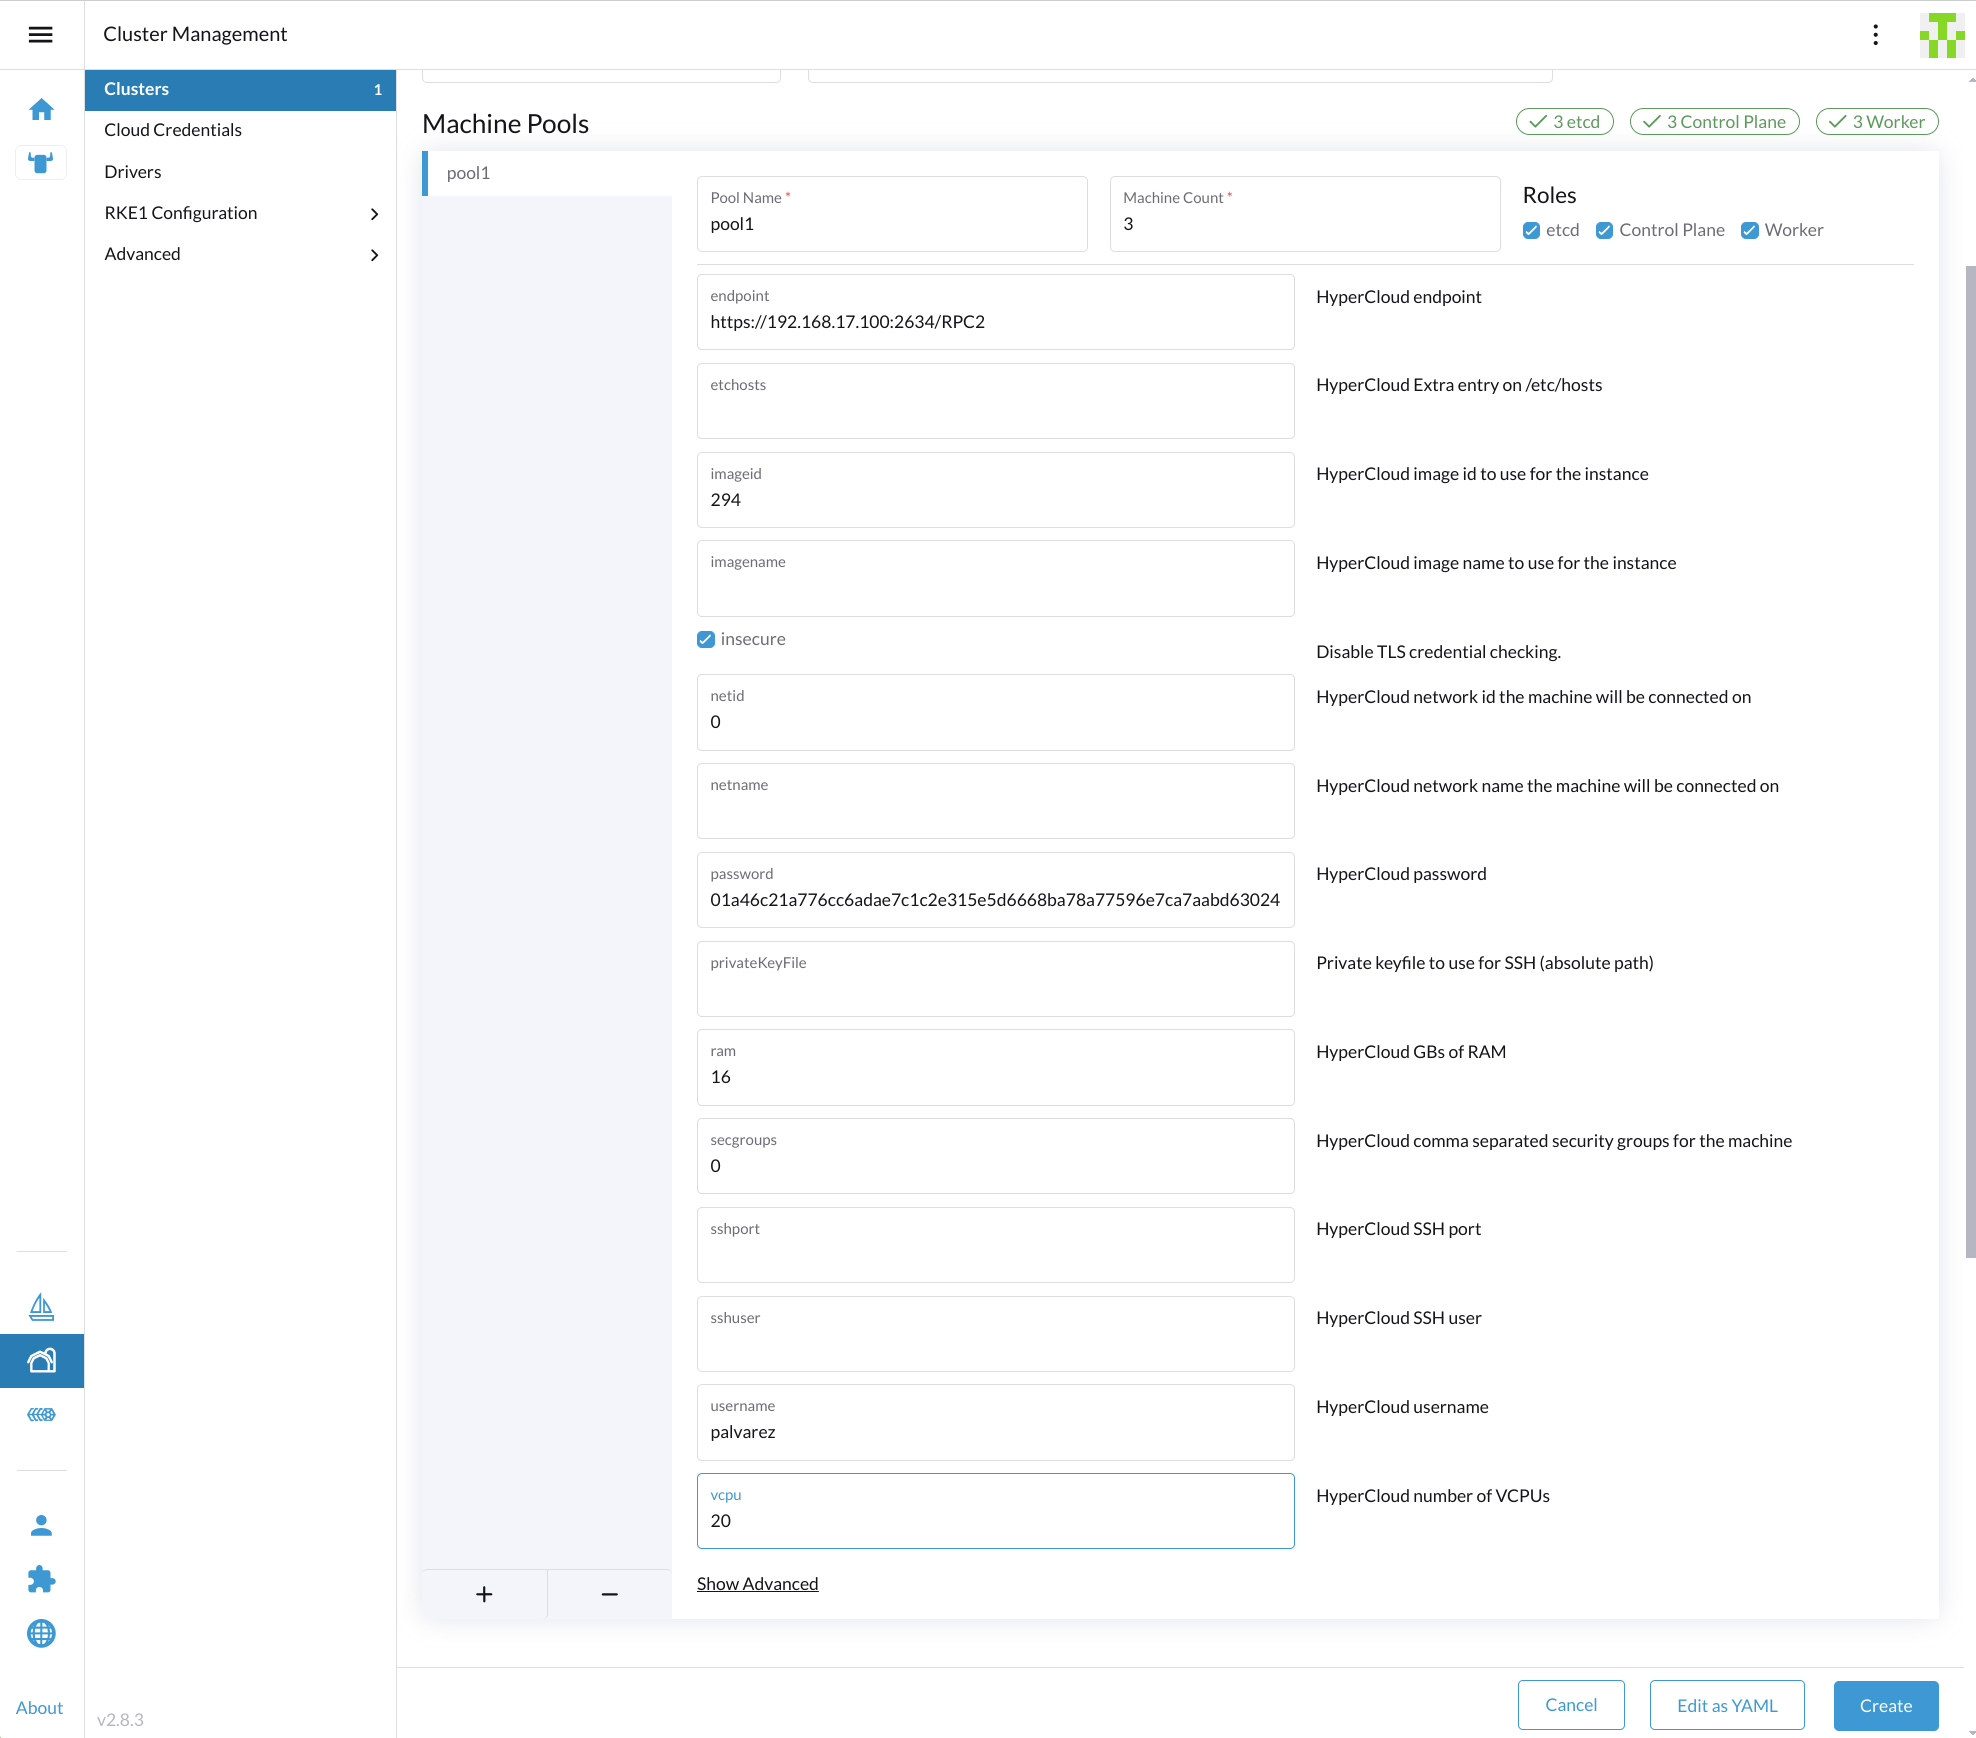
Enter HyperCloud details in the Machine Pools details, including the login for the HyperCloud user who will own the VMs.
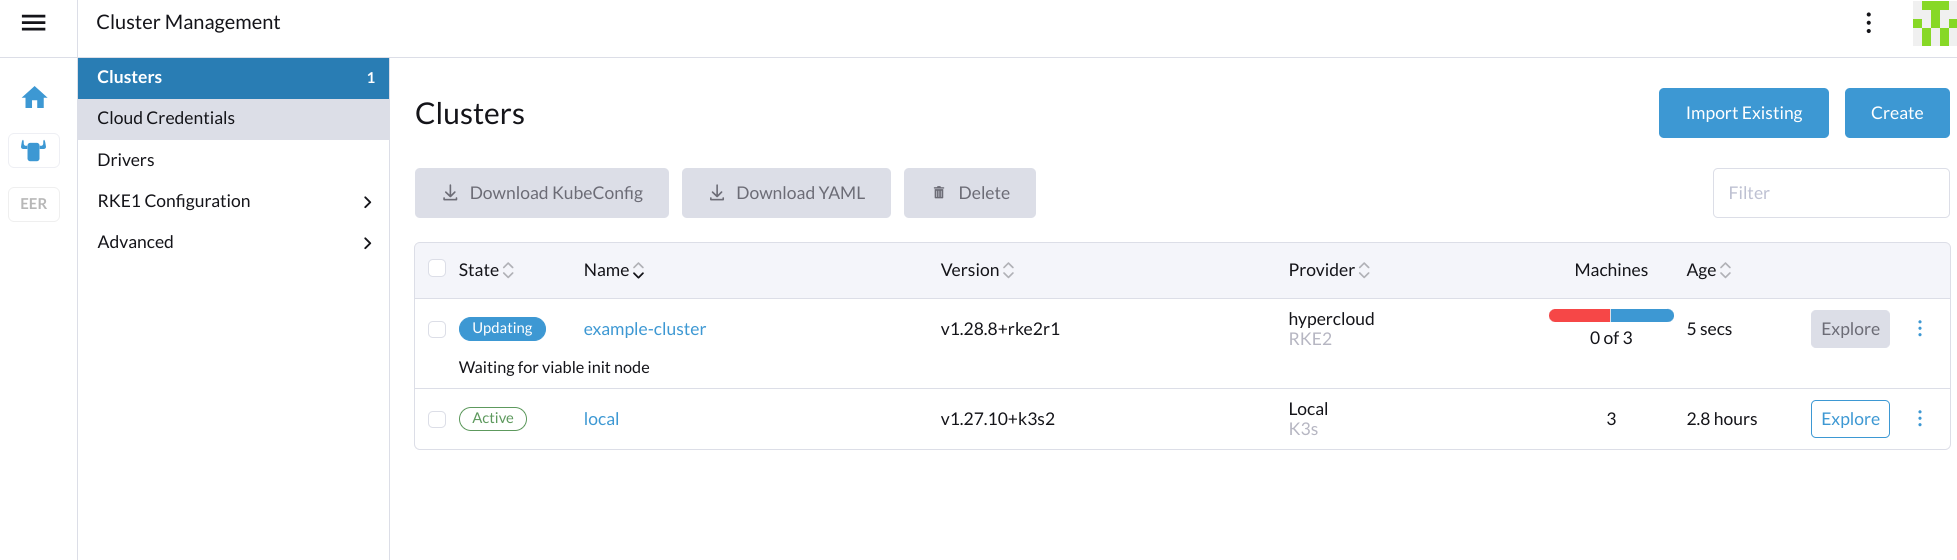
New cluster is added and will be in status Updating.
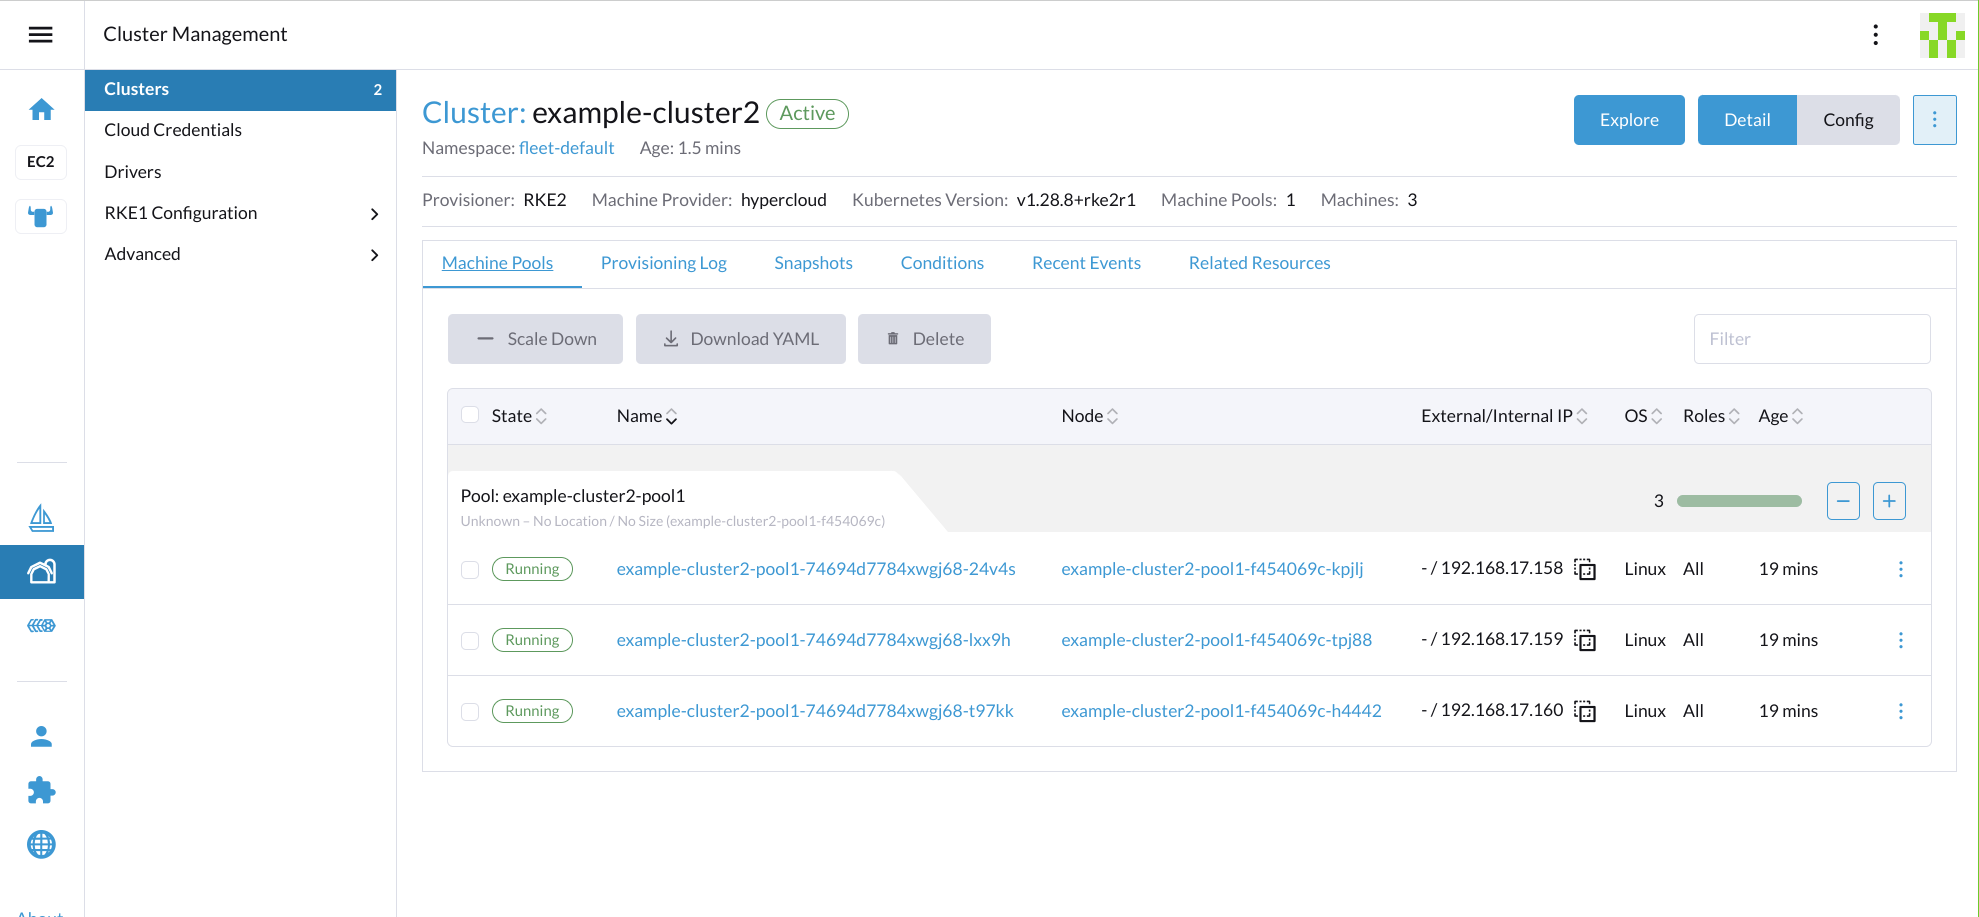
Detailed progress of VMs in the new cluster is shown by clicking on the cluster
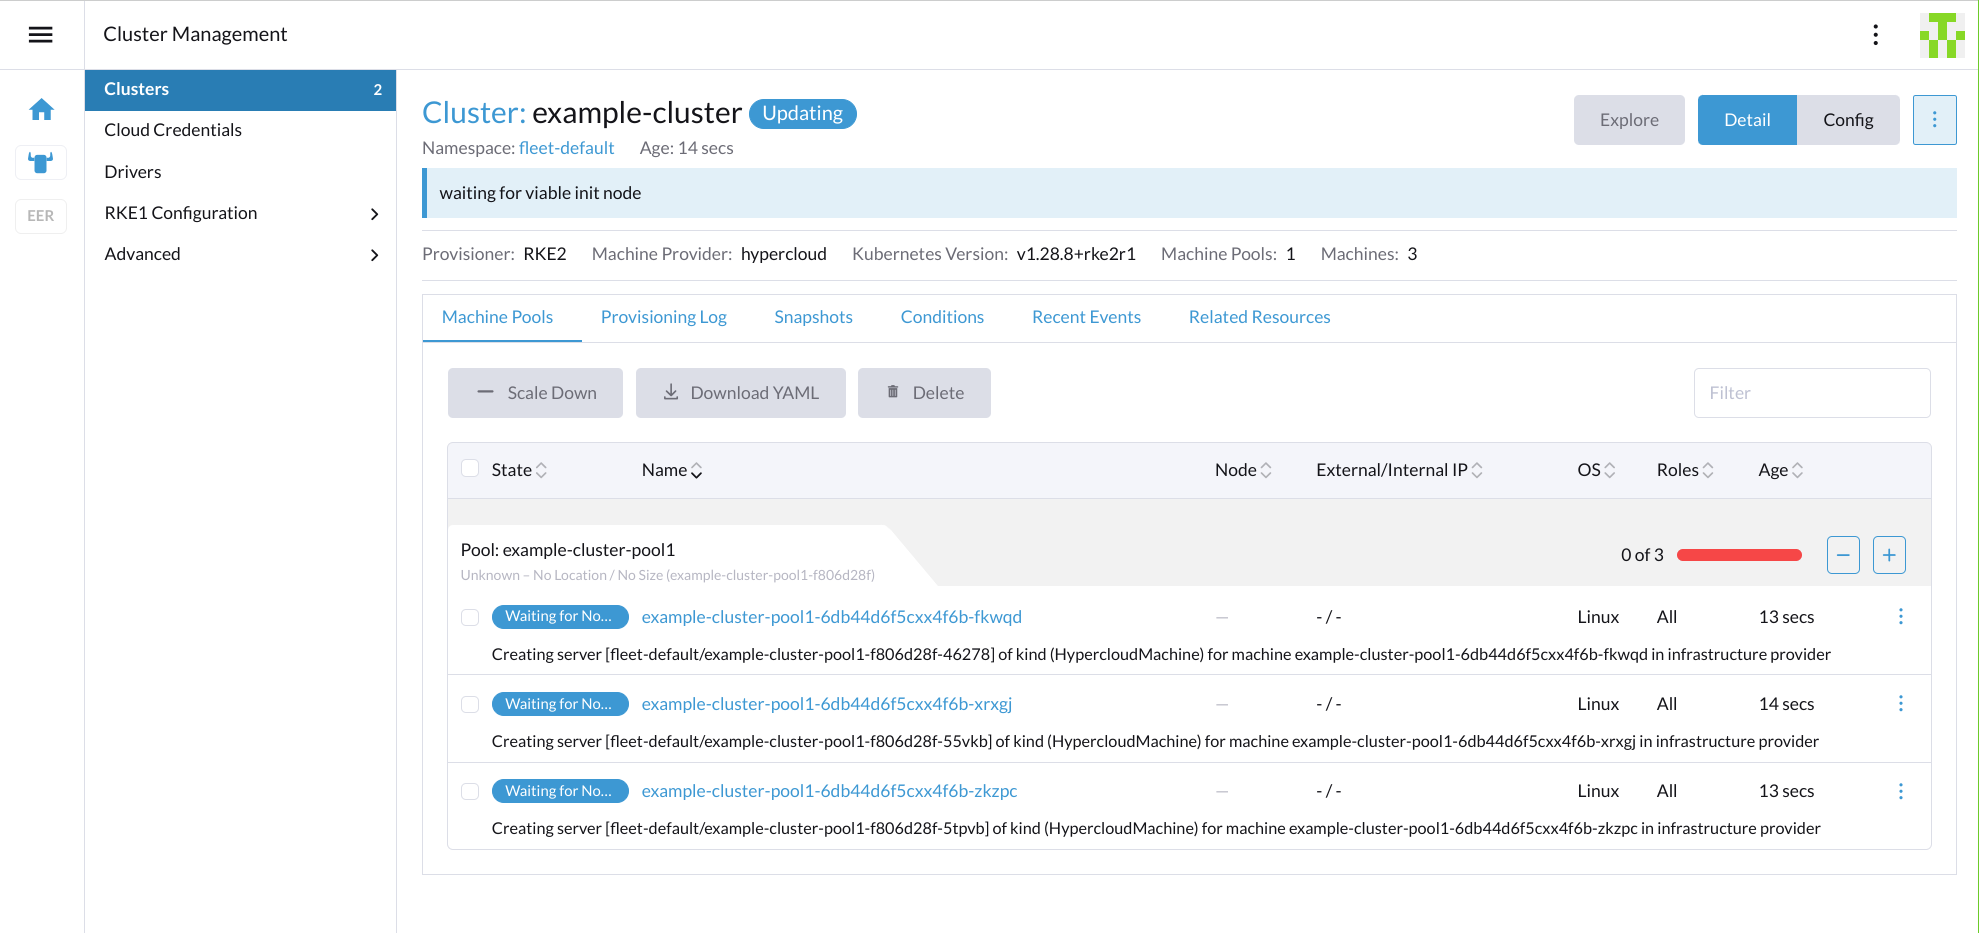
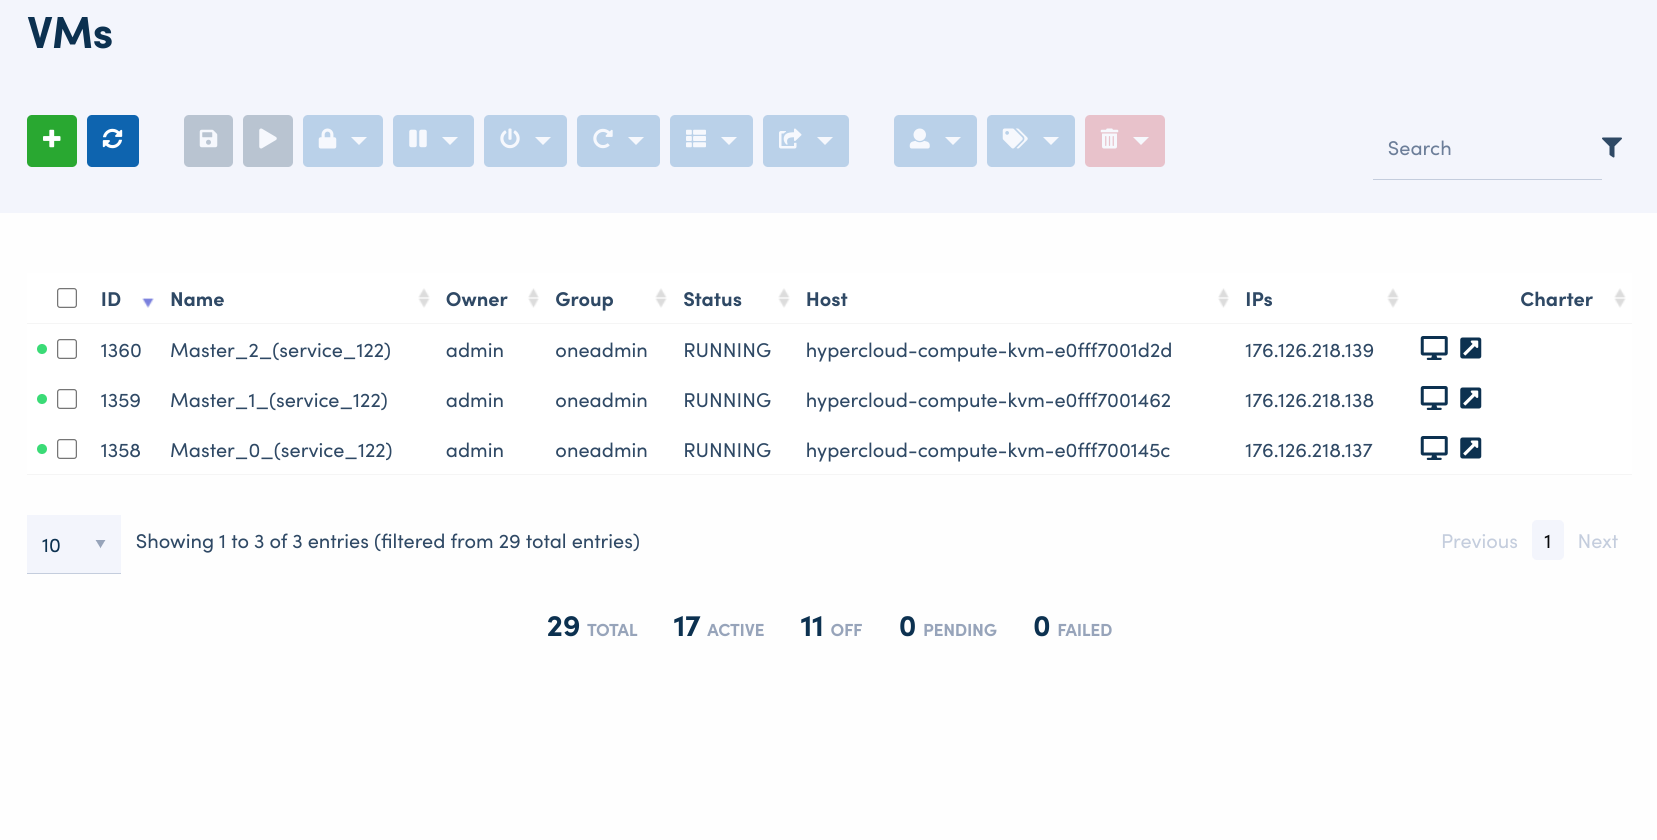
New VMs can be observed being created and configured in HyperCloud
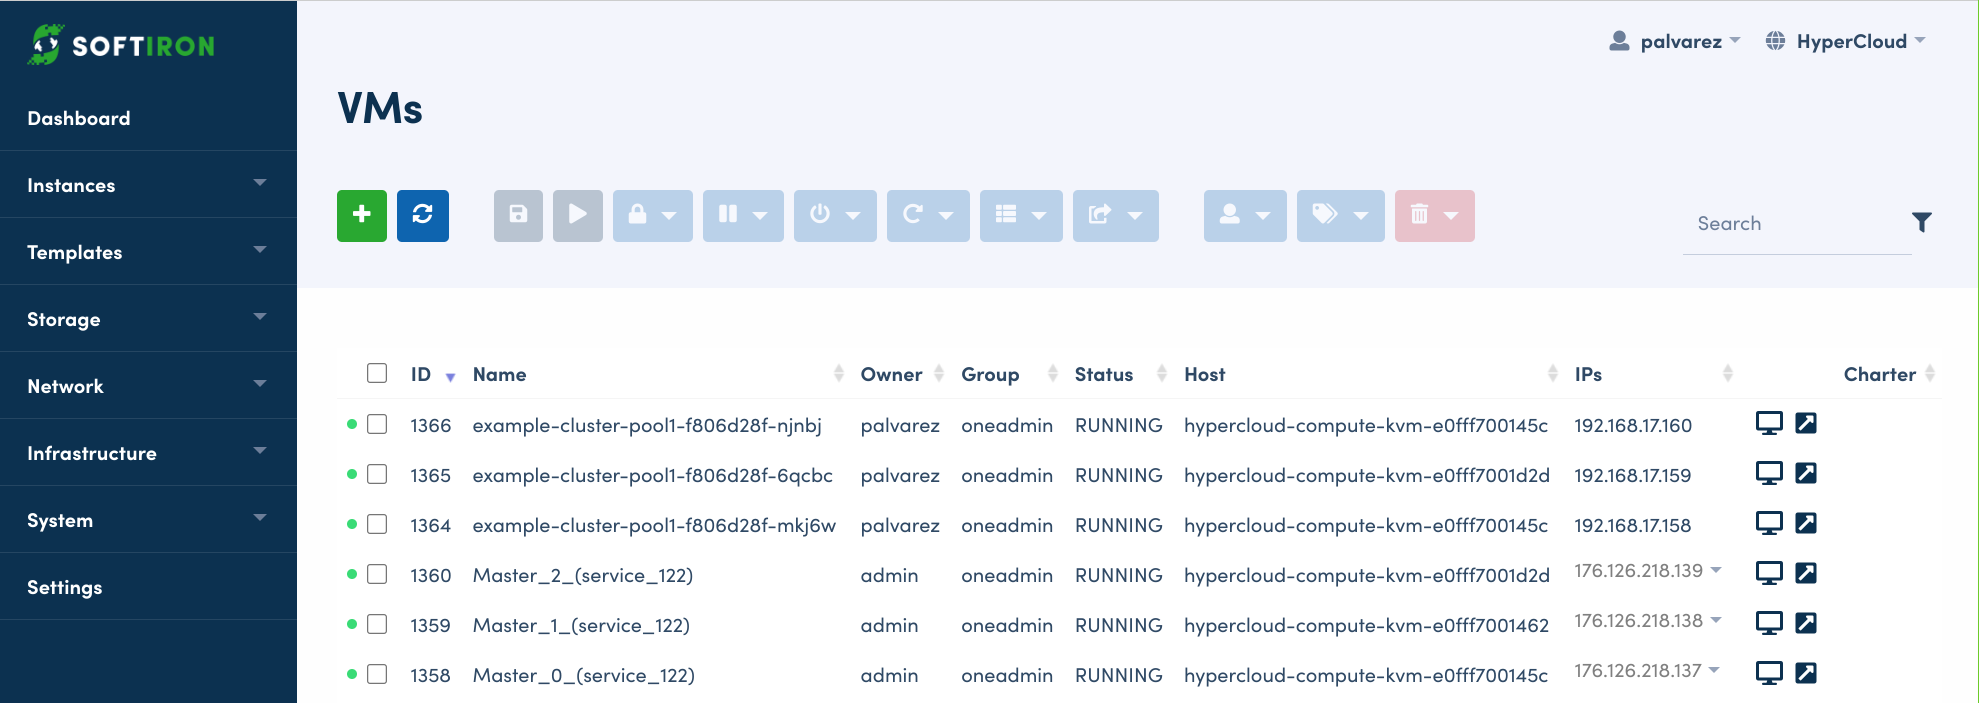
VMs are shown as running and the new cluster is ready to be used.
Outcomes
Rancher and HyperCloud (or VM Squared) enables you to deliver fast, and secure private cloud Kubernetes. Integrating Rancher’s secure RKE2 and efficient K3S Kubernetes options with HyperCloud secure by default architecture and straightforward private cloud provides best-of-breed outcomes.
Rancher and SoftIron products combine security and efficiency, protecting your business and accelerating private cloud value. Get your Kubernetes clusters running faster, with secure configurations, easy expansion and hassle-free upgrades for the whole system.
Build and consume like a cloud service provider
You can find out more about delivering Kubernetes-as-a-Service with Rancher at their website, and investigate how HyperCloud delivers a streamlined public cloud administration experience in the private cloud at the SoftIron website.
You may also want to learn more about our CSI driver, which enables easy storage provisioning on-demand.