
“Eat your own dog food” is all the more important when you are providing a platform for organizations to build and run a vast range of cloud solutions. So, it’s only natural that we decided to build our new blog in HyperCloud.
It was my first month back at work after a year of maternity leave, and my new manager Danny was explaining a certain metaphor that most of you will be very familiar with, but was new to me:
“Okay. You’ve heard about developers keeping machines, say, a web server, as ‘pets’, right? Where they’re irreplaceable, unique systems that can never be switched off, and when the one person who knows how they work leaves, the organisation is basically screwed? The opposite of that is herding cattle. Machines can be destroyed and rebuilt as-needed. Nothing is irreplaceable. It’s an essential element of HyperCloud - it helps our customers flexibly scale and adapt without impacting service availability or performance.”
Again, this won’t be news to any infrastructure engineers, but as someone who has previously mostly worked on front-end web dev stuff (some of which was definitely stored on other people’s ‘pets’!) it gave me some much-needed clarity. Danny’s helpful like that.
A large part of my role at SoftIron involves bridging the gap between the very cool things our engineers do, and the people who need those things. And the best way to do that is to develop a deep understanding of said things.
“So,” says Danny, “wanna try building our new blog’s production and staging VMs in HyperCloud with Terraform?”
Yes. Yes, I did.
And here’s how I did it.
Prerequisites
You will need:
- Access to a HyperCloud cluster (I used a cluster located at our San Francisco offices).
- Terraform installed on your development machine (I use an Ubuntu VM hosted within HyperCloud, and installed Terraform on it via Go).
- That’s it.
Writing the Terraform configuration script
Fortunately for this beginner, I didn’t need to start from zero, because SoftIron hosts a GitHub repository, HyperCloud examples, containing deployment examples for infrastructure on HyperCloud. Reading through the example infrastructure code there gave me some insight into what Terraform would need from me to create the production and staging VMs.
How I split up my configuration files
When Terraform runs, it will read all [FileName].tf files in your project directory as if they were one single file, so you can break your configuration down into as many files as you like. In my case, I kept the main configuration, the provider configuration, and the variable initialization in separate files. The staging and production VMs each had their own versions of these files stored in separate project folders.
I’ll share key snippets of my configuration files below, with a little commentary for context.
main.tf
This is where I declare the resources and setup for my virtual machine. Here, I’m sharing the staging environment’s main.tf, which only differs in structure from production in that it lacks a persistent disk, which I’ll address separately.
# VM Resource
resource "hypercloud_virtual_machine" "softiron-blog-stg" {
  name        = "softiron-blog-stg"
  description = "SoftIron blog staging environment"
  group       = var.blog_group
  cpu         = 2
  vcpu        = 4
  memory      = 4096
  permissions = "660"
  template_id = var.templateid
The lovely bit throughout this configuration is how simple HyperCloud makes it to call a template, security group, etc. for the VM, but I’ll get to that when we talk through the variable declaration file.
Next up is the remaining resources for the VM, and ensuring that it will have an SSH key to use when authenticating to HyperCloud:
nic {
    model           = "virtio"
    network_id      = var.vnetid
    security_groups = [hypercloud_security_group.softiron-blog.id]
  }

  disk {
    image_id = var.image
    size     = 10000
    target   = "vda"
  }

  context = {
    SSH_PUBLIC_KEY = var.ssh_key
    NETWORK        = "YES"
    SET_HOSTNAME   = "$NAME"
  }
The staging site doesn’t need a persistent disk, but the production site will; so I set that up with the config below:
 disk {
   image_id = var.persistent_disk
   target   = "vdb"
 }
Finally, I set a visibility local tag for the staging VM and public for the production VM. These tags will show up in HyperCloud Dashboard, the web-based GUI for HyperCloud. Set your tags to whatever you like - HyperCloud Dashboard will pull it in and display it in the VM information window.
(My development VM, for example, has the tag fruit = "pineapple". My reasons for this shall remain a mystery to most.)
  tags = {
    visibility = "local"
  }
provider.tf
One section of the provider config I want to highlight is the section below, where we configure the variables for logging into HyperCloud, and the endpoint:
# Provider-specific Configuration
provider "hypercloud" {
  endpoint = var.hc_endpoint
  username = var.hc_username
  password = var.hc_password
}
My colleague Chris set up our HyperCloud security groups as part of his work on the blog site infrastructure (expect a blog post from him down the line). The key thing is that we have a dynamic HyperCloud provider security group name stored for each VM in the blog_group variable.
The config for both production and staging blog environments was identical here, it’s only the values for each variable that distinguishes them.
variables.tf
This is where we instantiate each variable used in the rest of the Terraform configuration. So:
variable "hc_username" {}
variable "hc_password" {}
variable "hc_endpoint" {}
variable "ssh_key" {}
…and so on, for each variable.
terraform.tfvars
This is an essential part of your Terraform configuration - where we declare the value of each variable Terraform will use. Any variables that are not declared in this file will be requested by Terraform during the terraform plan stage. You’ll want to keep sensitive variables, in our case, hc_username and hc_password, out of this file just so that you are not storing them anywhere in plain text.
It’s this stage where HyperCloud really shines. Spinning up VMs on-demand via Terraform was much simpler than I expected. (Of course, you can easily create a VM directly within HyperCloud Dashboard yourself, but it’s the consistent automation via Terraform we’re seeking here).
Here, I want to highlight how we populated the variables for the OS image, VM template, persistent disk, and dedicated virtual network.
Setting the VM template and OS image
HyperCloud Dashboard provides easy access to all VM templates and images stored on our cluster.
We wanted to run the blog on Ubuntu, so all I needed to do was find the relevant Ubuntu template and image in HyperCloud Dashboard, and assign their IDs in terraform.tvars accordingly.
For the template, I browsed to Templates -> VMs using the main HyperCloud navigation bar, which looks like this:
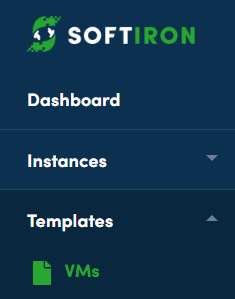
This section of HyperCloud Dashboard lists all existing VM templates on the cluster, example below:
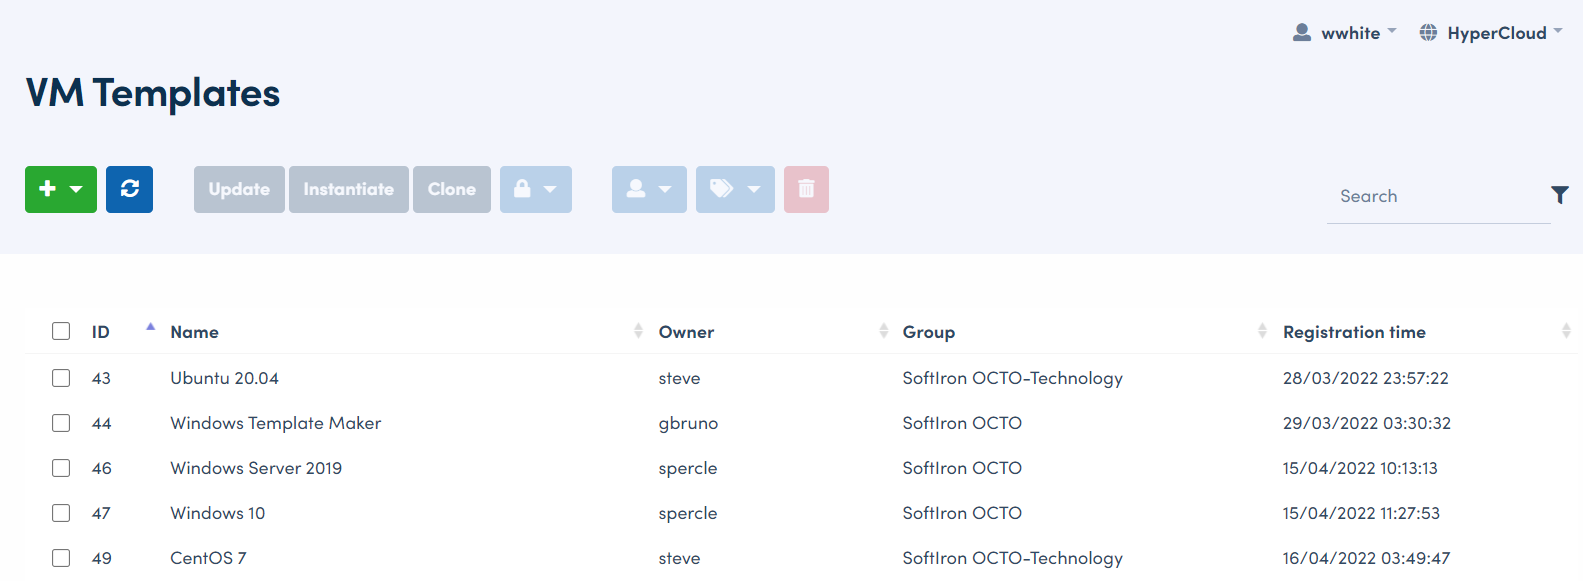
I then just used the search filter box at the top-right to filter down to Ubuntu templates only, then selected the template I wished to use, in this case, an Ubuntu template with ID 43.
So all we need in our variables file is:
templateid = 43
The process is identical for selecting the OS image, other than the fact that I navigate to Storage -> Images in HyperCloud Dashboard to find the ID for the image I’m after, in this case, an image with ID 48:
image = 48
As a side note, there’s a lot of additional information about each template and image, which you can view in theHyperCloud Dashboard GUI. For example, here’s the first tab for the Ubuntu image:
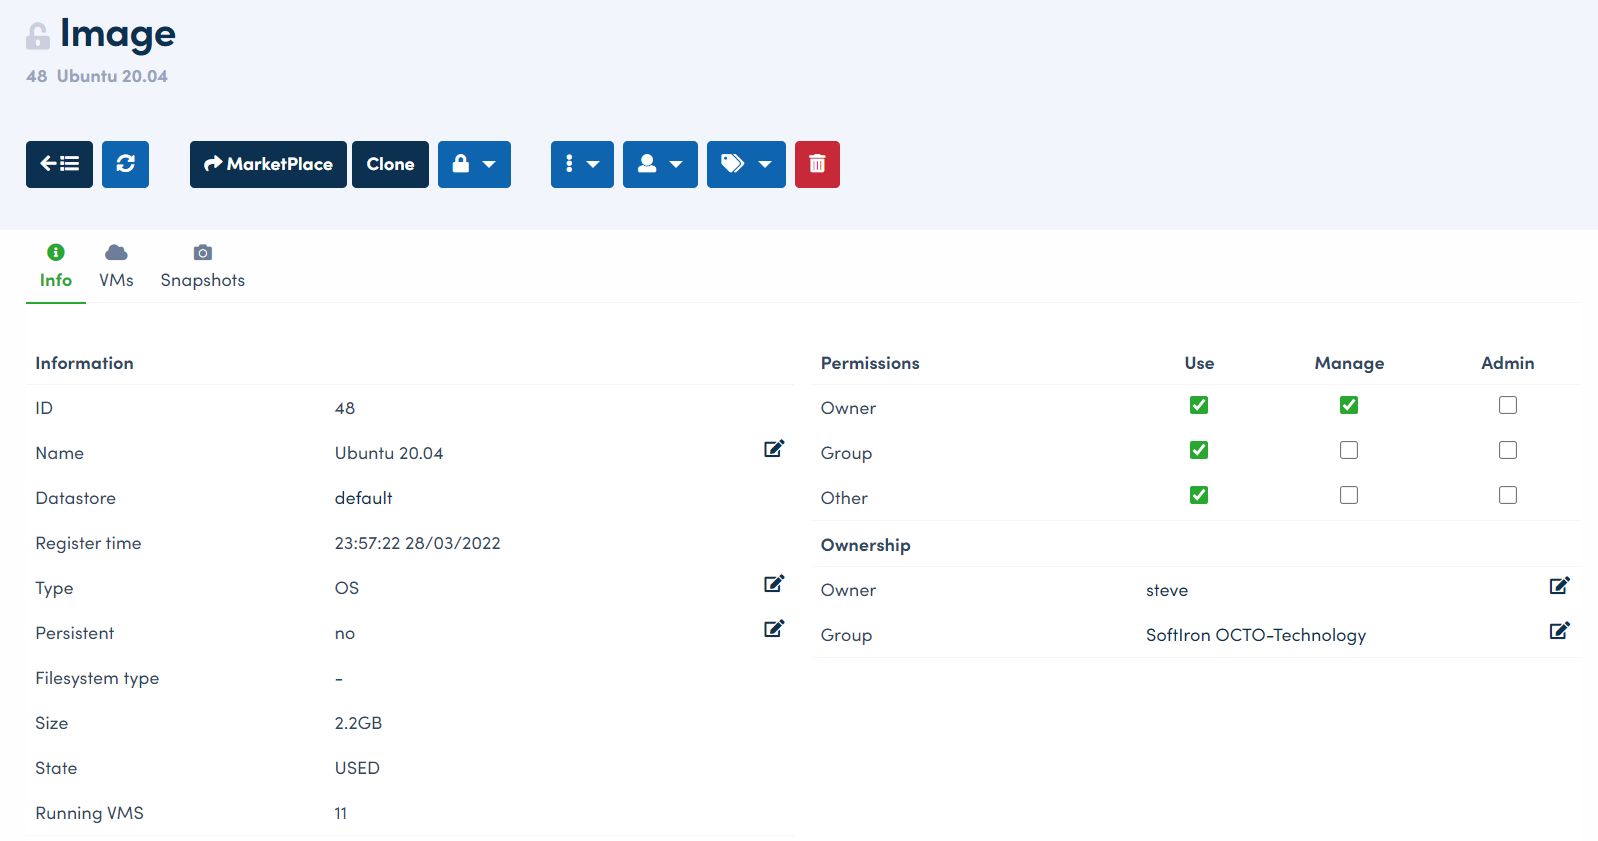
Along with the information above, you can navigate to the VMs and Snapshots tabs to view what VMs are currently using this image, and perform a variety of other useful operations from the image menu bar.
The Images area is also where we created a 32GB data block for our persistent disk, which was assigned the ID 12267 on creation, so:
persistent_disk = 12267
Finally, the blog staging and production VMs needed a dedicated virtual network within HyperCloud. I needed to reserve an IP address for each VM to use. To do that, I navigated to Network -> Virtual Networks and checked the box for the network I wished to use for my IP address reservation.
For the staging VM, I selected an internal network only available from our VPN:

And of course, I selected an internet-facing network for our production VM.
For each network, after checking the box, I chose “Reserve” from the add option in the Virtual Networks menu:
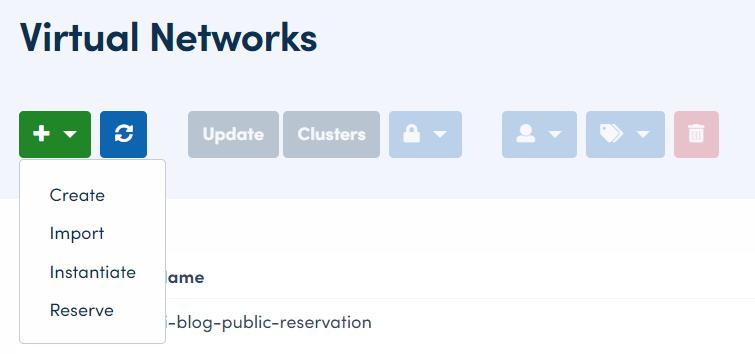
From there, all I needed to do was provide the number of IPs I wished to reserve (one) and name the new virtual network for each VM respectively:
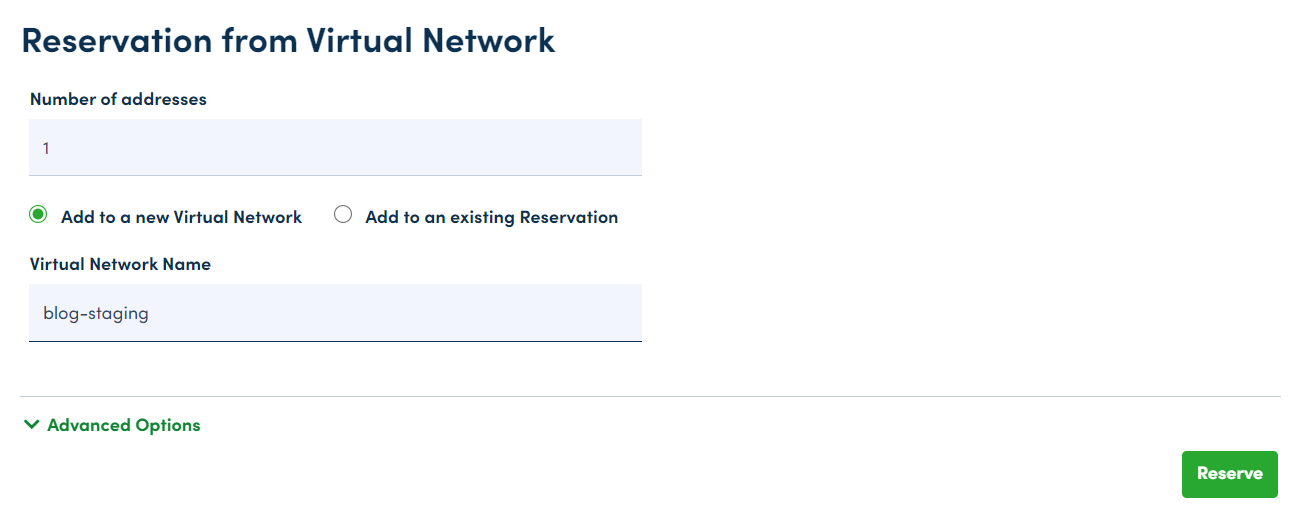
The Advanced Options menu allows you to specify IP ranges, but that wasn’t necessary here.
Once I had reserved an IP for each VM, I could then look at the reservation in HyperCloud Dashboard to get the ID number for each reservation - for example, ID 45 for the staging environment VM.
vnetid = 45
Now, when I run terraform plan and terraform apply, Terraform will have everything it needs to create the VMs for both the staging and production blog environments in HyperCloud.
Putting it all together
Finally, it’s time to turn the crank and see if I can actually get this thing started. Was I nervous? Yes. Did it work the first time? No. Was it my fault? Also yes. But it was easy to fix.
My stumbling point was actually at the very beginning, where I kicked things off by running terraform init. This is when Terraform checks that it has all the files and folders it needs to run. As a complete newbie to Terraform, I didn’t realize that I needed to include a terraform-modules folder and config. Don’t know why, but I just made a groundless assumption that if Terraform needed those, it’d create them itself somehow.
The modules are essentially little packages of Terraform configuration that can be re-used for a variety of projects. I can’t say I fully understand how to best work with modules at this stage of learning infra stuff, but I was able to re-use the ones I found in the terraform-modules folder at HyperCloud examples to base my own off of. Once I included those, terraform init concluded successfully.
Next was terraform plan, where Terraform checks to see if it can talk to all the machines and networks it needs to in order to do everything I’ve asked it to do. Unlike the init stage, everything looked good here!
Finally, to actually execute the Terraform scripts and create the VMs, we use terraform apply. Again, this all ran smoothly, and within a minute of inputting this command in my CLI, I saw my VMs appear in HyperCloud Dashboard under Instances -> VMs:

I was able to do all this as a complete beginner
Again, I don’t come from an infrastructure background. While I understand some of the basics, it’s only recently that I’ve needed to develop more than a surface-level knowledge of what practical infrastructure engineering entails.
Which is one of the really powerful things about HyperCloud: you don’t need to be an expert to do useful things with a HyperCloud cluster.
Really, all the times I got stuck or hit an error was because I was getting tripped up on the nuances of using Terraform. I was able to work out how to build the basics of something we can destroy and rebuild in an instant, and then hand it over to Chris, who actually is a skilled and experienced infrastructure engineer. He used the blog creation opportunity to work on a very awesome static sites project, which will further help us automate the process of spinning up internal and external website infra from now on - more on that in his future blog post.
Hear that crackling sound?
It’s my new neural connections starting to form. (That, or you really need to check on the power supply in your desktop tower.) Either way, I’m thoroughly enjoying the opportunity to deepen my knowledge and skills around computing infrastructure as part of my product knowledge work at SoftIron.
I hope that by sharing projects like this here, I’ll not only help demonstrate what makes HyperCloud special, but also inspire other people like me to experiment a little more with projects like these. We all have our niches, but today’s world is intricately woven with hidden cloud infrastructure. Grasping the basics not only demystifies the cloud but also unlocks a clearer understanding of the landscape we live and work in today.